
Welcome aboard to the our video site for sailors. We are being constantly blasted by scammers and pirates, so registration is invite only
contact@sailorsahoy.com with "Invite". No spam, no newsletters. Just a free account


![[ENG] NEW PARDO 43 – Boat Review & Sea Trial | The Boat Show](https://i.ytimg.com/vi/Gp11ophdfdU/maxresdefault.jpg)


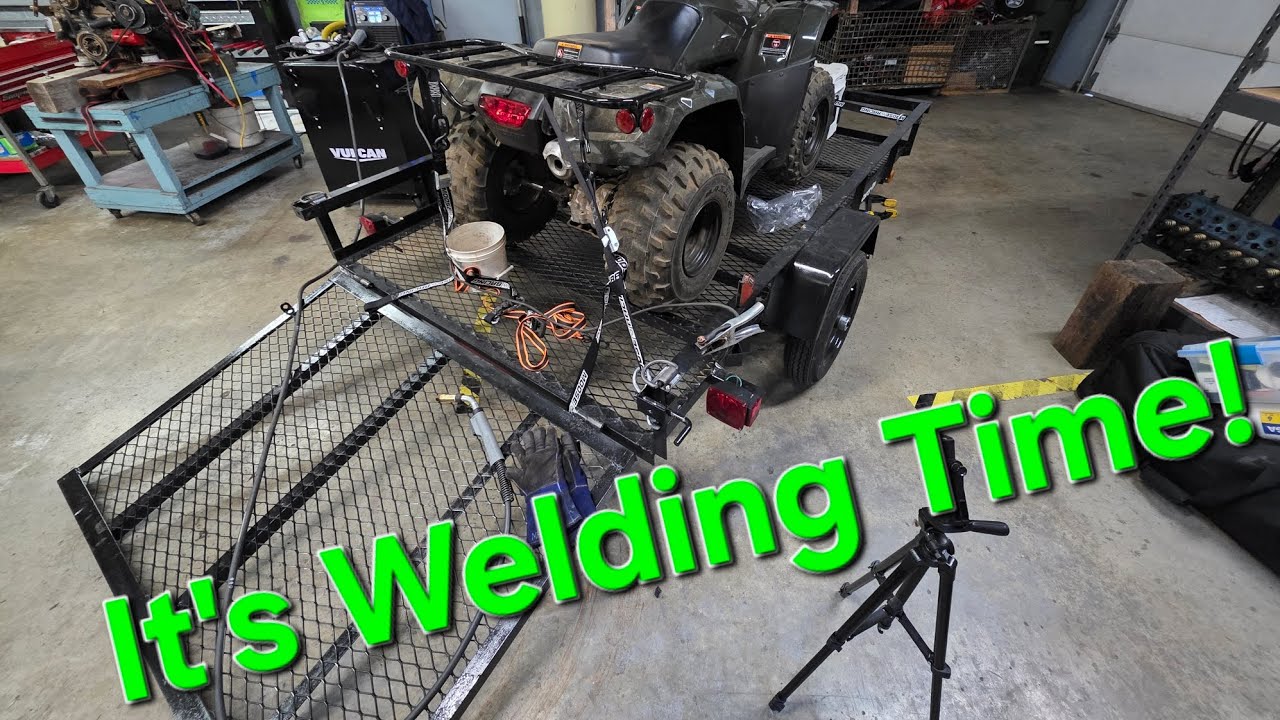
Replacing a Boat Trailer Axle ~ Measuring, Removal, Installation

In this video, i'm going to be covering the replacement of my trailer axle and hubs. I'll detail; - how to measure up for the new axle - removing the old axle - what to do if the hub is reluctant to go on the new axle - as well as one or two gotchas that you might want to avoid I'll also go into a curious problem I had with the trailer lights. Transcript: So that axle there, trailer axle, is pretty much 40 years old. I don't trust it anymore. So when you're selecting your replacement hub, I find it helped to really draw a good diagram of of the dimensions of the trailer and the existing axle. In particular, you want the hub face to hub face dimension, which on my trailer is 58 and 1/2 in. The other crucial dimension is the leaf spring center to leaf spring center, which in this case is 45 and 3/4 in. The other thing to consider is the rating of the axle, which for the Potter 19 is a 2,200, a 2 in by 2 in box section as shown there. To ensure compatibility, it's best to buy the hubs from the same place you buy the axle. And the particular details you're looking for is the number of studs, which in this case is five studs with a 4 and 1/2 in separation measured across there. Step one is to loosen those lug nuts so that I can remove the wheel later. A little good old PB Blaster. This side's coming off. Okay, time to get a jack under it. Do the same on the other side. Concrete blocks to um add add extra support. That all looks a bit different to the new one. Note the spacer between the leaf spring and the axle. These Ubolts are only 3, four years old. It's coming off pretty easy. Okay, now I'm on to the port side. As you can see, it's a bit wet today. Incidentally, those hubs are only about 5 years old, but they're not galvanized, so they're getting replaced with galvanized hubs. Universally pathetic shipments. That's what UPS stands for. Looks just about the same. Oh dear, there's a hole in the top of the axle. Uh, there isn't one in the new axle. Well, the hub won't go on the spindle. I was instructed to sand here after which the hub fitted. Okay. Okay, kids, don't make the same mistake as me and get you bolts that are too short. You see these new trailers have this adapter to avoid having a hole in the axle. That's what the old one looks like. Consequently, you need the longer Ubolts. That's what I've measured on the inner diameter of the hub. Well, that dimension is greater than the inner dimension of the hub. I found another socket on Amazon that should just about fit. Okay. So, if your brake lights don't work on your trailer, but the running lights are fine, check the ground. I added a separate wire here, that yellow wire, and ran that back independently. And now the light works perfectly. So, the ground is the problem, which if you look at the amount of rust on there, it's hardly a surprise. I'm using this old battery charger as a 12vt source and a drill bit to connect the positive into the connector. clamp the other side of the battery charger to the chassis. Yay, it's working. So, on my trailer, which is apparently ass backwards, that is the passenger side brake light. That's the driver's side brake light. Yay. And that is the tail lights. Yay. And there's the solution. So, what was really confusing was that the old ground was a partial ground that made the brake light look like the tail light. It's things like that that can make you think you're losing your mind. Okay. Well, here's the new socket. There's my old torque wrench. Set it to 50 foot-lb. Yay, it fits. Keep tightening it whilst turning the wheel. There we go. Loosen it off. Retighten it fingertight. Put the nut locking thing back on. Grease it up fully until grease starts to come out. Some new marine grease. Dust cap on and lug nuts on. Now do the port side. Those U bolts are really close to the end of the axle. I presume that's okay. There you can see the gap between the back of the axle and the oil seal surface. Last thing to do is to fit the dust cap which goes on there. It's necessary to encourage it on with a hammer. A lump hammer and a piece of wood was the most effective. Then fit the little rubber cap like that. And that there is the finished job. And there's the other side complete. Curiously, this gap is a bit different on this side compared to the other side. I'll check with the vendor whether that's acceptable. Yay, finished. One day I'll have replaced everything on this trailer. Then she'll be good for another 40 years. Thanks for watching.

