Những video mới nhất

How much can you really save by importing boat equipment directly from China? For our refit of ROAM, we decided to look beyond traditional marine suppliers and source a number of major components directly from Chinese manufacturers. The results were far more significant than we expected. For the specific products discussed in this video, we spent approximately $50,000 on equipment that would have cost roughly $150,000 through the U.S. sources we compared, representing more than $92,000 in savings. But saving money wasn’t the only consideration. In this episode, we break down exactly what we bought, what we paid, what comparable equipment cost in the U.S., and—perhaps most importantly—what it actually took to source these products ourselves. We discuss: 🛶 Our custom dinghy — including the specifications and customizations that made a direct-from-the-manufacturer purchase possible. 🔋 Our lithium battery cells — the foundation of our massive DIY house battery bank and one of the biggest opportunities for savings. ❄️ Air conditioning systems — including the challenges of comparing different BTU capacities and configurations when an exact like-for-like product isn’t available. ⚓ Windlass — comparing the equipment itself as well as the challenges of finding the correct marine hardware. 🔩 Custom turnbuckles — including one of the biggest lessons we learned about buying from overseas: getting exactly what you need can take time, patience, and very detailed specifications. 💡 Marine lighting — comparing quality, specifications, and pricing. ⚡ Electrical connectors and components — another category where buying directly from the manufacturer can produce substantial savings. We also talk honestly about the tradeoff between money and time. Buying directly from China isn’t as simple as clicking “buy.” You have to find manufacturers, communicate specifications, compare products, verify quality, understand certifications and materials, negotiate pricing, arrange shipping, and sometimes wait much longer than you would for something sitting on a U.S. dealer’s shelf. And when something goes wrong, returning it isn’t as easy as taking it back to the local marine supply store. So was it worth it? For us, absolutely—but there were some important caveats. One of the biggest misconceptions we want to address is the idea that “Made in China” automatically means cheap or poor quality. China manufactures everything from inexpensive consumer products to extremely sophisticated, high-quality industrial and marine equipment. The country of manufacture tells you very little about the quality by itself. The real challenge is finding the right manufacturer, the right product, and the right quality level. For everything we discuss in this video, quality was a major priority. We weren’t looking for the cheapest possible option. We were looking for equipment that met our specifications and was comparable to—or in several cases better than—the alternatives we found through U.S. suppliers. If you’re planning a sailboat refit, building a catamaran, outfitting a cruising boat, or simply wondering whether importing directly from China is actually worth it, this episode gives you the numbers and the real-world experience behind our decisions. We paid about $50,000 for roughly $150,000 worth of comparable equipment—and here’s exactly how we did it. ⛵ The refit may be over, but we’re still learning what it takes to build the cruising life we want. ☝More about us, our adventures, and how we do all this on our website.More about Roam here ⛵️https://sailingroam.com/our-sailboat/ 📲 Keep up with us on social FACEBOOK: https://facebook.com/sgsailingroam INSTAGRAM: https://instagram.com/sailing_roam ----------------------------------------------------------- WE'RE GERI AND SHAWN. A couple travelers out chasing the horizon, meeting the people, and capturing it to share with you. We’ve chosen to Roam the world by boat because, let’s face it, the most interesting path is rarely a straight line. As we learn to let go of our American drive to finish, and embrace the meandering routes across islands, oceans, continents, and people, we hope to gain a better sense of our world and our place in it. The path won’t always be comfortable or easy to find but, it will always #roam #Sailing #SailboatRefit #Catamaran #BoatRefit #DIYBoat #BoatBuilding #MadeInChina #ChinaImport #MarineEquipment #Liveaboard #CruisingLife #BoatLife #SailingLife #BoatProjects 00:00 Introduction 00:22 Channel Intro 00:33 Intro continued 03:15 Dinghy 05:37 AirCon 09:21 Batteries 15:05 M12 connectors 17:07 Class T fuses and holders 18:47 Windlass 23:14 Turnbuckles 27:29 Ceiling Lights 30:54 Universal Power Outlets 32:40 Wrap up 33:43 Like, Subscribe, and leave an emoji
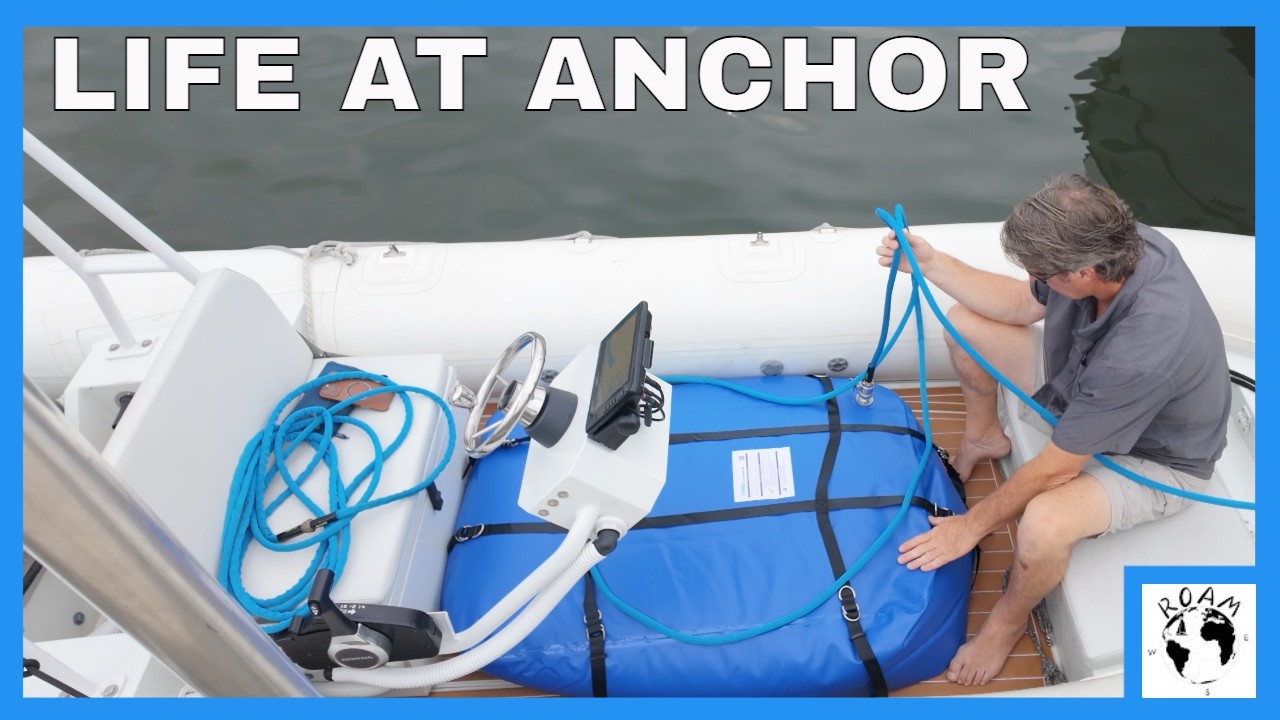
Life at anchor isn't always about sailing. Sometimes it's about solving the everyday challenges that come with living aboard full-time. In this episode, we've settled into one of our favorite anchorages in Spa Creek, Annapolis, and we're tackling three very different problems—each involving one thing we can't live without: water... and keeping the bugs out. The first challenge starts every time we weigh anchor. Anyone who's anchored in the Chesapeake knows the mud is legendary. It clings to the chain, anchor, and bridle, and without a raw water washdown pump, cleaning it off with our freshwater tanks simply isn't practical. Until we install a permanent washdown system, we came up with a temporary solution using a submersible pump, an extension cord, and a little ingenuity. It's not elegant, but it works surprisingly well. The next challenge is filling our freshwater tanks. Although ROAM is equipped with a watermaker, the Chesapeake's muddy water would quickly clog our pre-filters, making it an expensive and frustrating option. We could take the boat to a dock for free water, but doing so would mean giving up one of the very few anchorages in Spa Creek that's large enough for our 54-foot catamaran—and there's no guarantee we'd get it back. Instead, we found another solution. A 100-gallon portable water bladder rides in the dinghy to the free water dock in Annapolis, where we fill it (with permission from the Harbor Master), tow it back to ROAM, and pump the water directly into our tanks. It takes two trips and about an hour each time, but it's far easier than moving the entire boat every time we need fresh water. Finally, we tackle one of the less glamorous realities of summer cruising in the Chesapeake... Mosquitoes. Lots of mosquitoes. With the calmer conditions in Spa Creek comes an evening invasion of bugs, so Geri heads to the sewing machine to make custom mosquito screens for our salon hatches. Like many boat projects, it wasn't as simple as following an online tutorial. Most hatch screens are designed for square hatch openings, while ours have curved corners, so the design had to be completely rethought. Using spring steel wire, bug netting, and plenty of patience, the first prototypes slowly came together. They're not perfect... ...but if they let us sleep without donating a pint of blood every night, we'll call that a success. Cruising full-time isn't just about exotic destinations and perfect sunsets. It's also about solving dozens of small problems that make life aboard more comfortable, one project at a time. If you enjoy sailboat DIY projects, liveaboard cruising, catamaran life, and finding practical solutions to everyday boat problems, we think you'll enjoy this episode. ⛵ Thanks for coming along as we continue shaking down ROAM and turning her into the cruising home we've dreamed about for years. 00:00 Intro 00:17 Channel intro 00:29 Old school raw water wash down 04:11 Spa Creek 07:59 Potable water bladder 18:30 Mosquito nets 24:59 Wrap up/Like and subscribe 25:26 End Card ☝More about us, our adventures, and how we do all this on our website.More about Roam here ⛵️https://sailingroam.com/our-sailboat/ 📲 Keep up with us on social FACEBOOK: https://facebook.com/sgsailingroam INSTAGRAM: https://instagram.com/sailing_roam ----------------------------------------------------------- WE'RE GERI AND SHAWN. A couple travelers out chasing the horizon, meeting the people, and capturing it to share with you. We’ve chosen to Roam the world by boat because, let’s face it, the most interesting path is rarely a straight line. As we learn to let go of our American drive to finish, and embrace the meandering routes across islands, oceans, continents, and people, we hope to gain a better sense of our world and our place in it. The path won’t always be comfortable or easy to find but, it will always #roam #Sailing #Liveaboard #Annapolis #SpaCreek #Catamaran #CruisingLife #BoatProjects #DIYBoat #Watermaker #Anchoring #BoatLife #SailboatLife #ChesapeakeBay
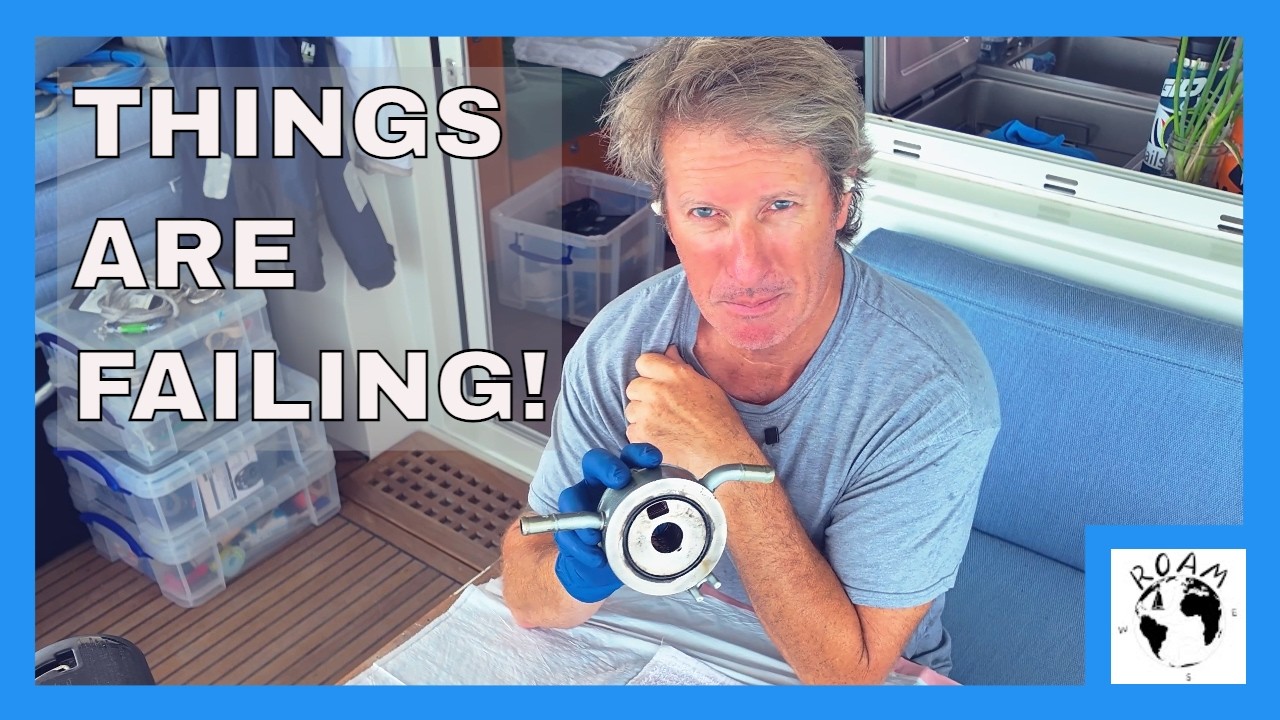
We knew the first few months after leaving the boatyard would be a shakedown cruise. After rebuilding nearly every major system aboard ROAM over the last two years, we fully expected to find bugs, experience a little "infant mortality" with new components, and spend time fine-tuning everything we'd installed. What we didn't expect... was quite this many problems, quite this quickly. In this episode, we're temporarily calling Cambridge, Maryland home while we work through a growing punch list of repairs and adjustments before continuing south. So far we've dealt with: ⚓ A failed bilge pump 🧺 A washing machine discharge pump that quit working 🔧 A leaking oil cooler on our starboard engine that mixed engine oil with the coolant Each repair has had its own challenges. Replacing the washing machine pump turned into a surprisingly complicated project thanks to the machine's European voltage and the difficulty of sourcing the correct replacement. Even after the new pump arrived and was installed, another leak led us to discover a damaged discharge hose that also needed replacing. Fortunately, the failed bilge pump is covered under warranty. While we wait for the replacement, we were able to swap in one of the identical pumps we'd already installed for another system, getting us safely back in business. The biggest challenge, however, has been our starboard engine. After discovering a failed oil cooler, Shawn spent days flushing contaminated coolant and cleaning the engine so we could safely operate it again. Sourcing the replacement cooler became its own adventure. The genuine Yanmar part carried an eye-watering price tag, while an identical industrial version had to be sourced overseas from Turkey. Until it arrives, we've come up with a temporary solution that lets us safely maneuver the boat at low power. It's not ideal, but it'll get us where we need to go. Thankfully, Cambridge has turned out to be a great place to tackle these unexpected projects. We have easy access to parts stores, hardware stores, and everything else needed to keep the repairs moving. Even better, we have good friends nearby who have helped make the delays a lot more enjoyable. When we're not turning wrenches, we're taking time to explore this historic Chesapeake town. Cambridge is rich in Colonial and Civil War history and is famously the birthplace of Harriet Tubman, whose incredible legacy is woven throughout this region and the story of the Underground Railroad. This is exactly what a shakedown cruise is for. Every repair, every adjustment, and every lesson learned makes ROAM a little more ready for the adventures ahead. The destination can wait. Right now, we're focused on building confidence in the boat—and ourselves—one repair at a time. ⛵ The refit may be over, but the learning never stops. 00:00 Intro 00:22 Channel intro 00:34 Where are we? 01:30 Oil Cooler 04:03 Cambridge on the land 09:23 Bilge Pump 11:36 Cambridge on the water 15:30 Washing Machine 17:38 Wrap up 19:16 Like and Subscribe 19:40 End Card ☝More about us, our adventures, and how we do all this on our website.More about Roam here ⛵️https://sailingroam.com/our-sailboat/ 📲 Keep up with us on social FACEBOOK: https://facebook.com/sgsailingroam INSTAGRAM: https://instagram.com/sailing_roam ----------------------------------------------------------- WE'RE GERI AND SHAWN. A couple travelers out chasing the horizon, meeting the people, and capturing it to share with you. We’ve chosen to Roam the world by boat because, let’s face it, the most interesting path is rarely a straight line. As we learn to let go of our American drive to finish, and embrace the meandering routes across islands, oceans, continents, and people, we hope to gain a better sense of our world and our place in it. The path won’t always be comfortable or easy to find but, it will always #roam #Sailing #Catamaran #ShakedownCruise #BoatRepairs #Yanmar #MarineDiesel #Liveaboard #BoatLife #DIYBoat #SailboatRefit #CruisingLife #ChesapeakeBay #CambridgeMD
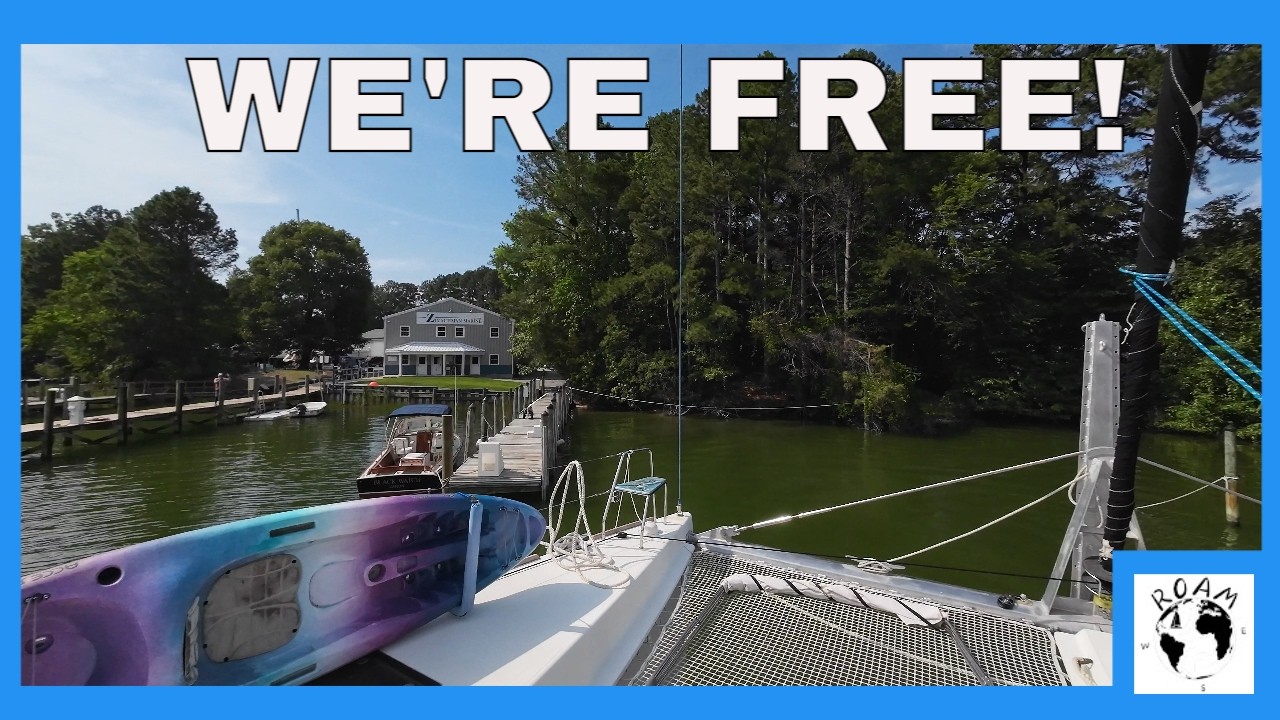
After two years on the hard, countless projects, and more than a few unexpected setbacks, ROAM finally leaves the boatyard. This is the moment we've been working toward since the day we hauled out what we thought would be a simple six-month refit. Two years later, we're motoring—and sailing—away with a boat that's been transformed from the keel up. As we shake the rust off and settle back into life under way, we're reflecting on the biggest lessons this refit taught us. Some we expected. Others we learned the hard way. In this episode, we share what we'd do differently if we ever tackled another major sailboat refit, including: ⛵ Why trying to do everything at once can slow you down more than it help 💰Importing from China can help you save significant money, but can cost you time. 🔧 Why you should test every system as you build it instead of waiting until the end 💰 Why almost every refit takes far longer and costs far more than planned—and how to prepare for that reality 🌡️ How temperature affects paints, adhesives, epoxies, plumbing, and other materials more than you might think 🚗 The hidden costs of a long haul-out, including lodging, transportation, storage, and day-to-day living expenses 🛠️ Why buying the right tool for the job is almost always worth it—even if you sell it once the project is finished ☝Be careful and cautious is you’re hiring out work. Between boatyards and third-party contractors the pitfalls are numerous. These aren't rules—just lessons learned from nearly two years of rebuilding our 54-foot catamaran while living the refit life every day. Whether you're planning your own sailboat refit, restoring a cruising boat, or simply dreaming about the cruising lifestyle, we hope these experiences help you avoid a few of the mistakes we made. Leaving the boatyard isn't the end of the journey—it's the beginning of the next chapter. There are still systems to test, bugs to work out, and plenty of adventures ahead, but for the first time in a long time, we're doing it from the water instead of the hard. Thank you to everyone who followed along through the refit. Your encouragement, ideas, and support helped us get to this day. ⛵ One step closer to sailing. 00:00 We’re ready to go 00:11 Channel intro 00:23 Leaving the boatyard 01:05 First cruise 03:40 Lesson - Reduce your scope 04:42 Lesson - Buying from China 06:11 Wicomico Yacht Club 06:42 Lesson - Test as you go 08:06 Lesson - The right tool for the job 09:20 Heading north 10:10 Lesson - More time and more money 11:51 Annapolis 12:45 Lesson - Know your material requirements 14:21 Harness Creek 14:58 Crumbl cookies 15:45 Lesson - Hiring our work 18:57 Wrap up ☝More about us, our adventures, and how we do all this on our website.More about Roam here ⛵️https://sailingroam.com/our-sailboat/ 📲 Keep up with us on social media FACEBOOK: https://facebook.com/sgsailingroam INSTAGRAM: https://instagram.com/sailing_roam ----------------------------------------------------------- WE'RE GERI AND SHAWN. A couple travelers out chasing the horizon, meeting the people, and capturing it to share with you. We’ve chosen to Roam the world by boat because, let’s face it, the most interesting path is rarely a straight line. As we learn to let go of our American drive to finish, and embrace the meandering routes across islands, oceans, continents, and people, we hope to gain a better sense of our world and our place in it. The path won’t always be comfortable or easy to find but, it will always #roam #Sailing #SailboatRefit #BoatRestoration #BoatyardLife #LiveaboardLife #Catamaran #CruisingLife #DIYBoat #BoatProjects #OffGridLiving #SailingLife

Two years ago, we hauled ROAM out of the water expecting a six-month refit. This week, we finally put her back where she belongs. Getting to splash day wasn't nearly as straightforward as we'd hoped. In fact, we were supposed to relaunch two weeks earlier—until we discovered a critical missing part: our starboard lower rudder bearing. The bearing had been removed when we hauled out and, after deciding not to replace it, we asked for it to be reinstalled. Somewhere along the way, that never happened. After two years in the yard, it was gone for good. What followed was a frantic search for a replacement. In the end, the only realistic solution was ordering a new bearing directly from the original manufacturer in France. Once we finally made contact, they identified the correct part and shipped it across the Atlantic. Two weeks later, it arrived—and thankfully fit perfectly. With the bearing installed, we were back on the launch schedule. Because of our draft, we needed a midday high tide to get back into the water, which meant the yard had only a few hours to lift us, suspend us over a drainage ditch, reinstall both rudders, and get us launched. Needless to say, it was stressful. There has been a lot of turnover at the yard over the last two years, and many of the operators handling the lift were young and relatively inexperienced. Watching our entire world hanging being lifted onto a trailer is nerve-racking under the best circumstances. Watching it happen while you're wondering whether everyone involved has done this exact maneuver before is something else entirely. Thankfully, the launch went smoothly. After a slow and careful lift—with plenty of hammering on the hull to locate bulkheads for the lifting straps—ROAM was finally lowered back into the water. For the first time in two years, her hulls were wet. Then came the moment of truth. Over the course of this refit, we replaced every underwater thru-hull, removed and rebuilt both sail drives, serviced countless systems, and opened areas of the boat that hadn't been touched in decades. As soon as we were floating, we began moving from bilge to bilge checking for leaks. The good news? Everything stayed dry. Well... almost. We did discover one issue waiting for future us: one of the keels is taking on water internally. It's not leaking into the boat and poses no immediate danger, but it will need attention the next time we haul out—hopefully somewhere warm in the Caribbean. For now, though, we're floating. After two years of hard work, setbacks, delays, redesigns, and more than a few moments when we wondered if we'd ever get here, ROAM is finally back in the water. And what a relief that feels. ⛵ One step closer to sailing. 00:00 Zero days to go 00:39 Channel intro 00:57 Unexpected splash day 03:16 Splash Day take two 07:17 Starboard rudder install 08:24 Heading to the ditch 09:31 Port rudder install 11:23 Heading to the ramp 12:09 Getting her bottom wet 12:45 Checking for leaks 13:24 She’s floating! 13:59 Wrap up 14:20 Like/Subscribe 14:40 End Card ☝More about us, our adventures, and how we do all this on our website.More about Roam here ⛵️https://sailingroam.com/our-sailboat/ 📲 Keep up with us on social FACEBOOK: https://facebook.com/sgsailingroam INSTAGRAM: https://instagram.com/sailing_roam ----------------------------------------------------------- WE'RE GERI AND SHAWN. A couple travelers out chasing the horizon, meeting the people, and capturing it to share with you. We’ve chosen to Roam the world by boat because, let’s face it, the most interesting path is rarely a straight line. As we learn to let go of our American drive to finish, and embrace the meandering routes across islands, oceans, continents, and people, we hope to gain a better sense of our world and our place in it. The path won’t always be comfortable or easy to find but, it will always #roam #SailboatRefit #BoatLaunch #SplashDay #CatamaranRefit #BoatyardLife #LiveaboardLife #DIYBoat #BoatRestoration #CruisingLife #SailingLife #Catamaran

After years of planning, researching, sourcing parts, and redesigning, we're finally building one of the most important systems on ROAM: our DIY lithium house battery bank. Instead of purchasing pre-packaged marine batteries, we imported individual 2.3-volt lithium cells directly from China and built the entire system ourselves. Why? Two reasons: cost and space. By building our own batteries, we saved approximately $40,000 compared to equivalent marine battery systems. Just as importantly, we were able to dramatically increase our energy storage density within the limited space available aboard the boat. More power, less space, and a lot more work. Our final design consists of: 🔋 Four 48-volt batteries for the primary house bank 🔋 Two 24-volt batteries for equipment not available in 48 volts ⚡ Enough stored energy to support our goal of comfortable off-grid cruising Building the bank turned out to be far more involved than simply stacking cells together. We started by constructing a custom battery box to provide a perfectly flat and level foundation. We added anti-arc protection, a Mylar isolation layer to reduce friction, and developed a somewhat unconventional tie-down system designed to keep the cells secure even in extreme conditions. Along the way, we faced plenty of challenges. Finding room for the BMS units, bus bars, contactors, fuses, and cabling while maintaining a clean layout proved harder than expected. After changing the cell arrangement partway through the build, we had to purchase new BMS sense wires and rethink portions of the installation. The result isn't quite as tidy as we'd envisioned, but it's safe, functional, and delivers exactly what we set out to achieve. Like many parts of this refit, it's a system we'll continue refining as we move closer to launch. If you're interested in: DIY lithium batteries Victron energy systems Off-grid power systems Sailboat electrical upgrades Catamaran refits Marine electrical design Liveaboard cruising preparation ...this episode is packed with practical lessons, problem-solving, and real-world DIY boat work. After years of planning, it's incredibly satisfying to finally see our power system taking shape. ⛵ One step closer to sailing. 00:00 Everyone asks us why 00:10 Channel intro 00:26 Battery box 04:51 Arc protection 06:52 Tie down system 09:50 BMS 11:38 Fuses, bus bars, and contactors 14:29 What do we have and why 16:58 Why did we do this and does it work 18:46 Like and subscribe 19:06 End Card ☝More about us, our adventures, and how we do all this on our website.More about Roam here ⛵️https://sailingroam.com/our-sailboat/ 📲 Keep up with us on social FACEBOOK: https://facebook.com/sgsailingroam INSTAGRAM: https://instagram.com/sailing_roam ----------------------------------------------------------- WE'RE GERI AND SHAWN. A couple travelers out chasing the horizon, meeting the people, and capturing it to share with you. We’ve chosen to Roam the world by boat because, let’s face it, the most interesting path is rarely a straight line. As we learn to let go of our American drive to finish, and embrace the meandering routes across islands, oceans, continents, and people, we hope to gain a better sense of our world and our place in it. The path won’t always be comfortable or easy to find but, it will always #roam #DIYLithiumBattery #BoatElectricalSystem #VictronEnergy #OffGridPower #SailboatRefit #CatamaranRefit #MarineElectrical #DIYBoat #LithiumBatteryBank #LiveaboardLife #CruisingLife #SailingLife

After two years of planning, fabricating, redesigning, and chasing down welders, our sailboat finally has a massive new solar arch—and we couldn’t be happier with how it turned out. In this episode of our catamaran refit, we install a custom stainless steel solar arch capable of supporting 4 x 575W bifacial solar panels, plus an additional two panels mounted on the coach roof for a total of 3,450 watts of solar power onboard. Getting to this point was anything but easy. We had three different welders flake out on us before finally finding someone willing to take on the project for a reasonable price. By the end, we were deeply involved in the build ourselves—designing the arch, cutting and fitting the stainless supports, and acting as the welder’s extra hands throughout the fabrication process. This wasn’t a simple bolt-on project. We handled all the heavy lifting ourselves and completed the installation without any help from the boatyard. Along the way, we also: Reused and integrated the original safety rails Added a cockpit shower and foot wash Built a strong, clean structure capable of supporting serious off-grid power generation The final result completely transformed the back of the boat. Not only does the arch look incredible, but it’s also a huge step toward our goal of building a fully self-sufficient cruising catamaran capable of running comfortably without relying on marinas or a generator. This project has been nearly two years in the making, and finally seeing the solar array mounted and complete feels like a massive milestone in our sailboat refit journey. If you’re into: Sailboat refits DIY boat projects Off-grid solar systems Catamaran upgrades Liveaboard cruising preparation Marine electrical systems …this episode is packed with real-world fabrication, problem-solving, and major progress. ⛵ One step closer to sailing. 00:00 Recap countdown 00:31 The plan 00:43 Channel intro 01:01 Coach roof panels 01:35 Measure for new arch supports 05:13 Cutting stainless 07:40 Cleaning up 08:34 Yep, still cutting stainless 10:09 Polish and reuse safety rails 11:33 Welding Day(s) 12:33 Pulling wires 12:59 Raise the panels 13:54 Shower box 14:01 Wrap up 15:03 Like and subscribe 15:25 End card ☝More about us, our adventures, and how we do all this on our website.More about Roam here ⛵️https://sailingroam.com/our-sailboat/ 📲 Keep up with us on social FACEBOOK: https://facebook.com/sgsailingroam INSTAGRAM: https://instagram.com/sailing_roam ----------------------------------------------------------- WE'RE GERI AND SHAWN. A couple travelers out chasing the horizon, meeting the people, and capturing it to share with you. We’ve chosen to Roam the world by boat because, let’s face it, the most interesting path is rarely a straight line. #SailboatRefit #SolarPower #OffGridLiving #Catamaran #DIYBoat #MarineSolar #BoatProjects #LiveaboardLife #Victron #SailingLife

One thing you can count on is the boatyard changing the plan with no notice whether you're ready or not. We were supposed to splash tomorrow morning, and instead they're putting us in at 6pm with the evening high tide. We still have a lot to do, so that's not welcome news. But first, we have to get the rudder's back in place.
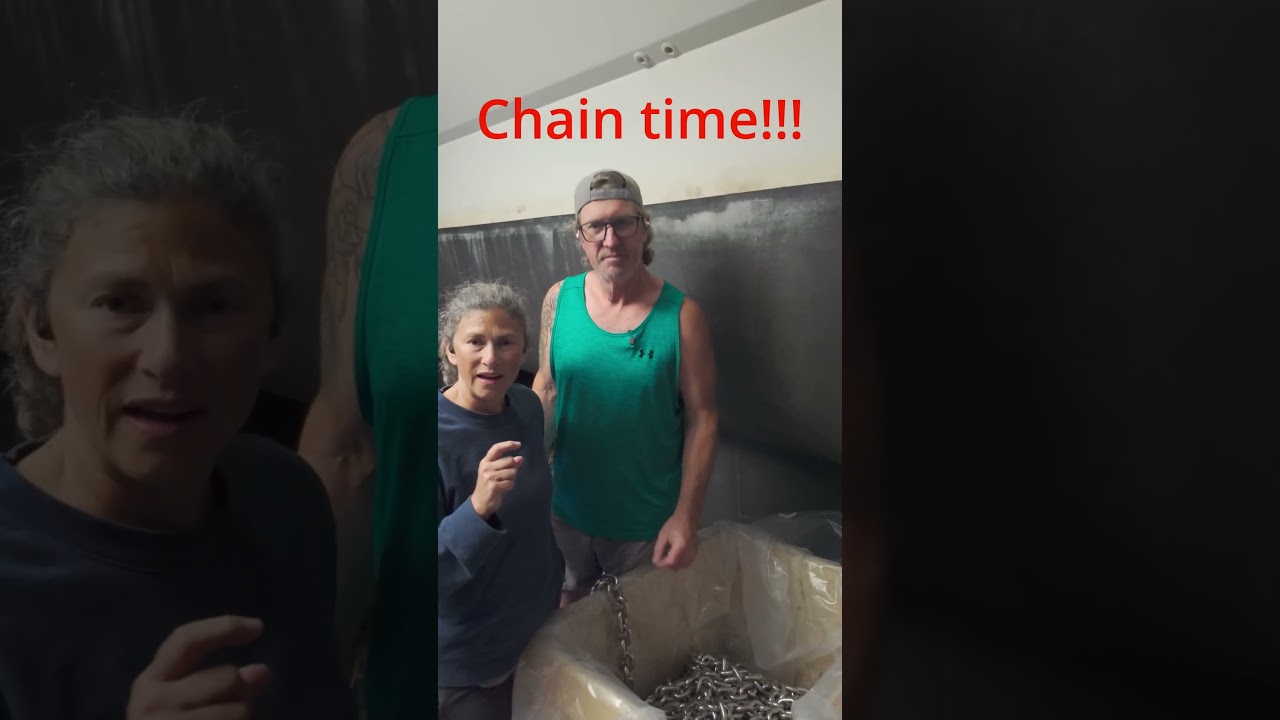
So many jobs, so little time remaining. Tomorrow we're being lifted on the trailer to put the rudders back in, so tonight is it. The last critical pieces must be done tonight. We'll sleep when we're dead! There is a ton of stuff under the boat that must be moved to make room for the trailer, and of course the chain and anchor needs to get on board. Let's get busy!

One of the remaining critical projects is wiring the wiindlass controls. What should have been a 1/2 days effort took the entire day, half the night, and still didn't quite work. Some projects are more frustrating than others.
We got a lot accomplished today, and it's a good thing because we're only 6 days from splashing! Shawn commissioned the Victron gear which means we have AC power! That means our appliances work! We also started to pretty up the boat before she goes back in, and after an entire day of work, the starboard hull below the chine is shiny and reflective. Big improvement!

We're running out of time, but today the helm controls are in and programmed. Does that mean we're ready to go? Not quite yet...

8 days lift until we splash and we're wrapping up a bunch of miscellanous projects...cut stainless for bimini frames, prep helms for new electronics, install a new muffler and more.

We have 9 days left on the hard, and today we're putting the steering back in place. Mistakes were made...

With only 10 days before we splash we have two big goals...power up the galley from the batteries and get the solar panels installed. One went great and the other was a dismal failure...

We are inside two weeks until we splash, so no new long-form video this time. We'll be giving you daily updates in short format, so check it out! So many project, so little time...

After months of rebuilding and living off the boat, we finally hit a turning point in our sailboat refit… we’re moving back aboard—even though the boat is far from finished. In this episode, we begin the process of putting the boat back together—reinstalling drawers, doors, and interior panels that have been out for what feels like forever. It’s a huge mental shift from teardown to rebuild, and seeing the spaces come back to life is incredibly motivating. At the same time, we made a big (and slightly crazy) decision: 👉 leave our apartment and move back onto the boat full-time. Right now, the boat is still very much a work in progress: No running water No permanent power (just extension cords to shore power) Minimal cooking setup And a 3-minute walk across the yard for the bathroom, showers, dishes… everything We focused on making just two spaces barely livable—our stateroom and the galley. And by “finished,” we mean the essentials: drawers back in, a mattress on the bed, and a place to put our clothes. It’s not comfortable. It’s not convenient. But it feels right. Eliminating the daily commute to the boatyard gives us back time and energy, and being onboard again is already pushing us to work longer, stay focused, and make faster progress toward launch. This is the reality of a liveaboard sailboat refit—messy, inconvenient, and sometimes uncomfortable—but also incredibly rewarding as we get closer to getting back in the water. If you’re into sailboat refits, DIY boat restoration, liveaboard life, and the behind-the-scenes reality of rebuilding a cruising catamaran, this episode shows what it really takes to push through the final stretch. We’re not done yet—but we’re closer than ever, and being back onboard is a huge step forward. ⛵ One step closer to sailing. 00:00 We’re putting it back together! 00:27 Channel intro 00:44 Drawers 02:45 We made a decision 04:31 Make one room habitable 06:56 MVP - minimum viable product 08:38 Need the galley 10:44 Tour of yard facilities 12:16 We’ve been here for 3 weeks 14:20 Like, Subscribe, Thanks for watching! 14:50 End card In Every Description: ☝More about us, our adventures, and how we do all this on our website.More about Roam here ⛵️https://sailingroam.com/our-sailboat/ 📲 Keep up with us on social FACEBOOK: https://facebook.com/sgsailingroam INSTAGRAM: https://instagram.com/sailing_roam ----------------------------------------------------------- WE'RE GERI AND SHAWN. A couple travelers out chasing the horizon, meeting the people, and capturing it to share with you. We’ve chosen to Roam the world by boat because, let’s face it, the most interesting path is rarely a straight line. As we learn to let go of our American drive to finish, and embrace the meandering routes across islands, oceans, continents, and people, we hope to gain a better sense of our world and our place in it. The path won’t always be comfortable or easy to find but, it will always #roam #SailboatRefit #LiveaboardLife #BoatRenovation #DIYBoat #SailingLife #CatamaranRefit #BoatProjects #OffGridLiving

After nearly two years without a mast, this is the moment everything finally starts to come back together—we step the mast AND reinstall the boom, and for the first time in quite awhile… it actually looks like a sailboat again. In this episode of our sailboat refit, we complete one of the biggest milestones of the entire project. We fully rebuilt our mast from bare aluminum—removing every piece of hardware, sanding off all the paint, rewiring everything, servicing blocks, upgrading clutches, and fabricating custom components including spreader ends, light mounts, and a welded masthead plate for our electronics. But getting here wasn’t easy. Our biggest setback came from sourcing new turnbuckles for the standing rigging. After importing them and waiting weeks for delivery, we discovered they were completely wrong—threads didn’t match, pins didn’t fit, and we had no choice but to cancel our crane day. After sending detailed measurements and specifications back to the manufacturer, we waited another two months for replacements. This time, everything fit. Ten weeks after cancelling our original appointment, the crane returned and we successfully stepped the mast without incident. Then, just two days later—with the help of the yard—we were able to get the boom back on as well, bringing the rig back together faster than we expected. Now, with both the mast and boom installed, we’re rapidly working through the final tasks needed to get this boat back in the water. The momentum is real, and after a long refit journey, we’re finally closing in on launch. If you’re into sailboat refits, rigging, mast stepping, DIY boat restoration, and cruising sailboats, this episode captures both the technical work and the emotional milestone of putting the rig back together. We’re not done yet—but we’re closer than ever. ⛵ One step closer to sailing. 00:00 Feeling nervous 00:41 Channel intro 00:57 New turnbuckles 04:12 Diamonds 05:22 Step the mast 10:32 Reinstall the boom 11:26 Wrap up/Like and Subscribe 12:14 End Card #SailboatRefit #MastStepping #BoatRigging #DIYBoat #SailingLife #LiveaboardLife #BoatRestoration #CatamaranRefit

In this episode of our sailboat refit, we tackle the prep work for installing new LED lighting throughout the boat, and like most projects on a refit, it turned into more work than expected. To start, we removed two stainless steel light strips in the salon—each holding eight fixtures—and enlarged every mounting hole to fit the new lights. For this, we tried a new tool: a Vevor punch-out tool, which made quick, clean work of resizing the holes and turned out to be a game changer for this kind of job. From there, we worked our way around the perimeter of the salon, widening additional light cutouts and even removing a hanging cabinet to gain access and properly modify the openings. With the holes prepped, we installed new wire harnesses throughout the interior, setting the stage for a clean and reliable lighting system. The cockpit lights got the same treatment, where we used fish tape to run new wiring through tight spaces. The most challenging part of the entire project was feeding wires for the salon’s perimeter lights—tight, hard-to-reach areas that required patience, a flexible fish tape, and a grabber tool to finally get everything in place. This episode is a real look at the behind-the-scenes work required for upgrading sailboat lighting, including cutting, wiring, and problem-solving in confined spaces. It’s not glamorous, but it’s a critical step toward making the boat feel functional, comfortable, and liveable again. With all wiring run and holes prepped, and new LED lights installed, we’re finally ready to reinstall the ceiling panels and bring the interior back together—and that’s a huge milestone after months of teardown. If you’re into sailboat refits, marine electrical projects, DIY boat upgrades, or LED lighting installs, this episode walks through the process, tools, and lessons learned along the way. ⛵💡 00:00 Intro to project 00:33 Channel intro 00:51 Remove stainless steel sheets 01:19 Vevor punch-out tool 04:23 Enlarge holes in wood supports 06:22 Prep lights for installation 07:59 Build wiring harnesses 09:01 Reinstall stainless steel sheets 12:20 Overhead cabinet holes and wires 15:39 Enlarge holes for perimeter lights 17:09 Fish wires through perimeter and cockpit ceiling 18:30 Install lights 19:49 test lights 21:23 Wrap up 22:02 Like, Subscribe, Emoji, Bye! 22:23 End Card ☝More about us, our adventures, and how we do all this on our website.More about Roam here ⛵️https://sailingroam.com/our-sailboat/ 📲 Keep up with us on social FACEBOOK: https://facebook.com/sgsailingroam INSTAGRAM: https://instagram.com/sailing_roam ----------------------------------------------------------- WE'RE GERI AND SHAWN. A couple travelers out chasing the horizon, meeting the people, and capturing it to share with you. We’ve chosen to Roam the world by boat because, let’s face it, the most interesting path is rarely a straight line. As we learn to let go of our American drive to finish, and embrace the meandering routes across islands, oceans, continents, and people, we hope to gain a better sense of our world and our place in it. The path won’t always be comfortable or easy to find but, it will always #roam #SailboatRefit #BoatLighting #MarineElectrical #DIYBoat #LiveaboardLife #LEDUpgrade #BoatProjects

After ripping out every hose and fitting in our boat, we committed to completely rebuilding our fresh water pressure system from scratch. Instead of traditional marine hose, we chose a PEX-A plumbing system with expansion sleeves—a residential solution that’s marketed as being easy for DIY installers and far more reliable long term. We’re firm believers that when household systems make sense on a sailboat, they’re often the better choice. To do it right, we invested in the expensive electric PEX expansion tool (the only realistic option for working in tight hull spaces) and ordered hundreds of fittings—sleeves, elbows, tees, manifolds, valves, and couplers in both 3/4" and 1/2". We ran nearly 200 feet of PEX pipe through both hulls, from engine room to engine room, and all the way forward into the bow locker. It was one of the biggest infrastructure projects of our refit. We made the final connection, stood back, and felt confident. We were wrong. To pressure test the system, we rented an air compressor and immediately discovered far more leaks than we thought possible. We chased air hissing through bilges, engine rooms, and heads. Soapy water bubbled at fittings we were sure were perfect. What followed was seven days of troubleshooting, ten hardware store runs, and a crash course in the realities of PEX-A installation. Here’s what we learned: Technique with the expansion tool matters more than you think PEX connections don’t seal well in very cold temperatures Reusing a fitting is nearly impossible once you cut off the sleeve—one tiny score mark can cause a leak Confidence is not the same thing as a sealed system After days of cutting, re-expanding, re-routing, and re-testing, we finally sealed the entire freshwater system...or so we thought. This episode is a real-world look at DIY boat plumbing, PEX installation on a sailboat, and the kind of setbacks that come with a full refit. It’s not glamorous—but reliable onboard systems are what make long-term cruising possible. On to the next project. 00:00 Episode Intro 01:00 Channel Intro 01:19 Day 1 - Optimism 07:38 Day 2 - Hopeful 10:59 Day 3 - Persistant 14:11 Day 4 - Frustrated 17:40 Day 5 - Laugh so you don’t cry 20:18 Day 6 - %&*#@ 23:44 Day 7 - Forlorn 24:52 Wrap up 25:32 Like, Subscribe, Emoji, Bye! 26:00 End Card ☝More about us, our adventures, and how we do all this on our website.More about Roam here ⛵️https://sailingroam.com/our-sailboat/ 📲 Keep up with us on social FACEBOOK: https://facebook.com/sgsailingroam INSTAGRAM: https://instagram.com/sailing_roam ----------------------------------------------------------- WE'RE GERI AND SHAWN. A couple travelers out chasing the horizon, meeting the people, and capturing it to share with you. We’ve chosen to Roam the world by boat because, let’s face it, the most interesting path is rarely a straight line. As we learn to let go of our American drive to finish, and embrace the meandering routes across islands, oceans, continents, and people, we hope to gain a better sense of our world and our place in it. The path won’t always be comfortable or easy to find but, it will always #roam #SailboatRefit #BoatPlumbing #PEX #DIYBoat #LiveaboardLife #CruisingSailboat #MarineSystems