


تازہ ترین ویڈیوز

It still has the peel ply on but the carbon/nomex panel and CT40 sail batten are now laminated in place. Looks mint! Some high end lamination work from Shayne gping on here. The photos in the post I made this morning don't do it justice. It's a shame we are going to paint it all. Olly is pretty keen to clear coat the underside whoch is his bedroom roof so let's see if he can get it done in time before Mum comes along and bogs over it 😅🤪

Paikea refit, sailboat restoration, America's Cup boat salvage, carbon fiber repair, sailboat interior renovation, DIY boat building, Volvo Ocean Race, boat refit series, Valencia boat yard After a huge push, we’re finally at a point where the massive refit of our boat, Paikea, is showing serious progress. We’re tired, but we’re committed, and in this video, we’re giving you a full walkthrough of where we’re at. In this episode: America’s Cup Salvage: We grabbed carbon nomex panels and massive carbon sail battens from an AC catamaran Alinghi 5 that was being demolished. Will it look cool or just warped?! Structural Stiffening: See how we used a carbon batten to fix a flexy spot on the cabin roof and prevent hard points. Interior Demolition & Reconstruction: We’ve ripped out the old liner and are rebuilding the galley, companionway steps, and a MASSIVE new pantry. Upcycled Lockers: Harry is building out his cabin with lockers from the Volvo Ocean Race boat, Trifork/Ericcson 4. Aft Cabin & Shower: The shower/toilet area is finally taking shape! We’re fitting a carbon sink we’ve been saving for years and building a custom floor. Smart Plumbing: We’re installing a gravity-fed black water system to minimize pumps and complexity. Plus new hatches, stanchions etc. We’re getting there! From the "oh sh#t" phase to the "okay, we’re getting there" phase, I definitely think there is a bit of crazy here on Paikea. CHAPTERS: 0:00 - Intro & America's Cup Salvage 1:40 - Cabin Top Stiffening with Carbon Battens 3:35 - Galley, Pantry & Companionway Steps 5:50 - Harry's Upcycled Lockers (Ericsson 3) 7:40 - New Flush Hatches 8:30 - Aft Cabin: Shower, Toilet & Carbon Sink 12:25 - Aiden's Room & Plumbing Reroute 14:45 - Progress & Pizza Night USEFUL LINKS ➜ Supporting blog post https://youngbarnacles.com/ ➜ Want to go deeper? Access our detailed composites videos, project files, and community on the Youngbarnacles Members Hub: https://youngbarnacles.com/plans/all-access-memberships/ ➜ Need world-class engineering for your project? Learn more about our professional design and consultancy services at SYAS Performance: https://syasperformance.weebly.com/ ➜ Free Sailing Library: Check out our free guides on composites, systems, and seamanship: https://www.youngbarnacles.com/resources MUSIC YouTube Audio Library ➜ https://www.youtube.com/ SAFETY DISCLAIMER: PROFESSIONAL WORK This video documents professional marine work with significant risk of injury or vessel damage. This is NOT DIY instruction. You are solely responsible for your own safety and actions. We are not liable for any application of this information. Full Disclaimer: https://youngbarnacles.com/website-disclaimer/

Upwind sails are up so are we going upwind? The instrument says 150 degrees. And down here, it says we're going downwind. So which is it? In this video, we're sailing the Gunboat 66 to settle one of the most confusing topics in sailing: the difference between apparent wind and true wind. We'll break down why your instruments seem to lie, how dagger board trim changes everything, and what it actually means to be a true wind speed boat. CHAPTERS: 00:00 - Intro: Are We Going Upwind or Downwind? 01:17 - Setting Up: Gunboat 66 with Code Zero 02:17 - The Numbers: True Wind 150°, Apparent Wind 125° 03:08 - Dagger Boards: Grip, Slip, and Why They Matter 04:22 - The Simple Explanation: True Wind vs. Apparent Wind 05:30 - Adjusting Boards for Apparent Wind Shift 06:20 - Safety: Why Dagger Boards Prevent Capsizing 07:46 - Cockpit Layout & Slave Rings Discussion 08:33 - Autopilot Disaster: Why Heading Hold is Dangerous 09:13 - What is an "Apparent Wind Boat"? 10:15 - Watching the Apparent Wind Climb 11:20 - Myth Busting: True Wind Aft, Apparent Wind Forward 11:57 - Autopilot Wind Mode Explained 13:03 - Speed Over Ground vs. Speed Through Water 13:50 - True Wind Speed vs. Apparent Wind Speed 14:34 - "We're a True Wind Speed Boat" 14:51 - The Big Lie: Claiming Wind Speed with Apparent Wind 15:25 - Sail Change: Code Zero Down, Gennaker Up 16:43 - Gennaker Up: New Numbers (True 140°, Apparent 90°) 17:33 - Paddle Wheel Problems & GPS Calibration 18:21 - True Wind 9.6 kts, Apparent 6.3 kts – The Mistake Explained 19:50 - Early Morning: Goosewinged in 15 Knots 20:35 - Rain, Reefs, and Hoisting Mainsail Downwind 21:23 - Winch Layout & Flying Jammers 22:24 - Surfing: 9.7 Knots! 22:44 - Heavy Weather: True Wind 20 kts, Apparent 13 kts 23:59 - The "Wind Speed" Trap 24:47 - Using GPS for True Wind Calculations 25:20 - 10 Knots SOG = 10 Knots AWS? No, You're Not Doing Wind Speed 26:27 - Younger Crew in Shitty Weather (The Perks of Skippering) 27:31 - Parking the Boat & Wrap Up WHAT YOU'LL LEARN Why apparent wind and true wind can show opposite directions How to adjust dagger boards as the apparent wind shifts forward The safety advantage of dagger boards over fixed keels Why "heading hold" on autopilot will collapse your spinnaker How to use wind mode (apparent wind angle) correctly The difference between a "true wind speed boat" and everyone else Why comparing speed over ground to apparent wind speed is complete B.S. BOAT FOR SALE The Gunboat 66 featured in this video, Outnumbered , is currently for sale. Make/Model: Gunboat 66 Location: Spain More info https://youngbarnacles.com/gunboat-66-for-sale/ USEFUL LINKS ➜ Supporting blog post https://youngbarnacles.com/ ➜ Want to go deeper? Access our detailed composites videos, project files, and community on the Youngbarnacles Members Hub: https://youngbarnacles.com/plans/all-access-memberships/ ➜ Need world-class engineering for your project? Learn more about our professional design and consultancy services at SYAS Performance: https://syasperformance.weebly.com/ ➜ Free Sailing Library: Check out our free guides on composites, systems, and seamanship: https://www.youngbarnacles.com/resources MUSIC YouTube Audio Library ➜ https://www.youtube.com/ SAFETY DISCLAIMER: PROFESSIONAL WORK This video documents professional marine work with significant risk of injury or vessel damage. This is NOT DIY instruction. You are solely responsible for your own safety and actions. We are not liable for any application of this information. Full Disclaimer: https://youngbarnacles.com/website-disclaimer/

In this short, we look at a critical detail often missed when installing a self-tacking jib track: the load on the jib car bearings. A flat track can cause uneven wear. For the complete guide on jib track systems, curvature, and setup, watch the full video here: https://youtu.be/tb7EPtCFjNo USEFUL LINKS ➜ Supporting blog post https://youngbarnacles.com/ ➜ Want to go deeper? Access our detailed composites videos, project files, and community on the Youngbarnacles Members Hub: https://youngbarnacles.com/plans/all-access-memberships/ ➜ Need world-class engineering for your project? Learn more about our professional design and consultancy services at SYAS Performance: https://syasperformance.weebly.com/ ➜ Free Sailing Library: Check out our free guides on composites, systems, and seamanship: https://www.youngbarnacles.com/resources MUSIC YouTube Audio Library ➜ https://www.youtube.com/ SAFETY DISCLAIMER: PROFESSIONAL WORK This video documents professional marine work with significant risk of injury or vessel damage. This is NOT DIY instruction. You are solely responsible for your own safety and actions. We are not liable for any application of this information. Full Disclaimer: https://youngbarnacles.com/website-disclaimer/

A quick technical breakdown of jib sheet lead angle and the function of the clue board. The hole you select on the clue board determines the vertical angle of the jib sheet. This angle controls the draft and twist of the sail by changing where the sheet's force is applied relative to the sail's center of effort. In short: The line from the block should lead roughly to the jib's center of effort for balanced trim on a given point of sail. Selecting the wrong hole will incorrectly flatten the foot or over-tighten the leech, hurting performance. SAFETY DISCLAIMER: PROFESSIONAL WORK This video documents professional marine work with significant risk of injury or vessel damage. This is NOT DIY instruction. You are solely responsible for your own safety and actions. We are not liable for any application of this information. Full Disclaimer: https://youngbarnacles.com/website-disclaimer/ USEFUL LINKS ➜ Supporting blog post https://youngbarnacles.com/the-art-and-science-of-the-self-tacking-jib/ ➜ Want to go deeper? Access our detailed composites videos, project files, and community on the Youngbarnacles Members Hub: https://youngbarnacles.com/plans/all-access-memberships/ ➜ Need world-class engineering for your project? Learn more about our professional design and consultancy services at SYAS Performance: https://syasperformance.weebly.com/ ➜ Free Sailing Library: Check out our free guides on composites, systems, and seamanship: https://www.youngbarnacles.com/resources MUSIC YouTube Audio Library ➜ https://www.youtube.com/
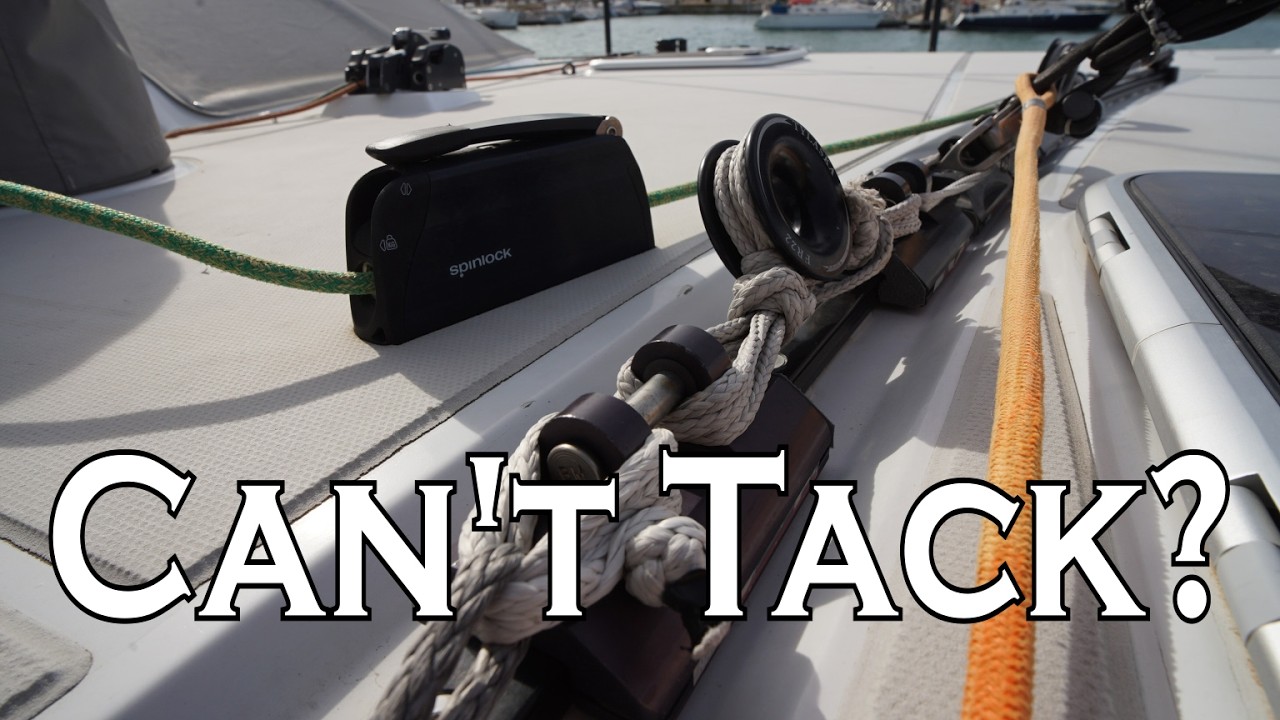
Self-tacking jibs seem like magic—just turn the wheel and the sail does all the work. But the reality is far more complicated. In this video, we break down the engineering, the compromises, and the hard truths about self-tacking jib systems on board a Gunboat 66. From curved tracks and sheeting angles to friction points and the dreaded "outforce" lines, we explore why some systems work beautifully and others leave you fighting the helm. What we cover: Why your self-tacker might not actually self-tack The critical difference between curved and straight tracks Why the sheet lead position changes everything The friction problem (and why some systems are doomed) How to spot a good setup vs. a bad compromise Whether you're shopping for a new boat, upgrading your rig, or just trying to understand why your jib keeps sticking in the middle of a tack, this video lays out the truth. CHAPTERS: 0:00 - Intro: The Promise of Self-Tacking 1:20 - The Gunboat 66 Setup 2:50 - Why the Car Won't Go Outboard 4:15 - The Mast Lead Problem 6:30 - Curved Tracks Explained 8:45 - Straight Tracks = Bad Sail Shape 11:00 - Multiple Cars & Staysail Setup 13:45 - The Vertical Curve Compromise 16:30 - Systems to Avoid 18:20 - Summary: Friction is the Enemy USEFUL LINKS ➜ Supporting blog post https://youngbarnacles.com/the-art-and-science-of-the-self-tacking-jib/ ➜ Want to go deeper? Access our detailed composites videos, project files, and community on the Youngbarnacles Members Hub: https://youngbarnacles.com/plans/all-access-memberships/ ➜ Need world-class engineering for your project? Learn more about our professional design and consultancy services at SYAS Performance: https://syasperformance.weebly.com/ ➜ Free Sailing Library: Check out our free guides on composites, systems, and seamanship: https://www.youngbarnacles.com/resources MUSIC YouTube Audio Library ➜ https://www.youtube.com/ SAFETY DISCLAIMER: PROFESSIONAL WORK This video documents professional marine work with significant risk of injury or vessel damage. This is NOT DIY instruction. You are solely responsible for your own safety and actions. We are not liable for any application of this information. Full Disclaimer: https://youngbarnacles.com/website-disclaimer/

A deep dive into the digital design workflow behind a custom composite shower floor for a sailboat refit. This isn't just CAD—it's the full cycle: starting with hands-on "Cardboard Assisted Design" (CAD) for ergonomics and feel, translating that into precise 3D computer models, verifying fits with 3D scanning, and finally preparing files for 3D printing the moulds. In this video, we cover: Transitioning from a physical cardboard mock-up to a digital 3D model. Detailed CAD design of the shower floor's drainage: creating a central valley, specifying falls (slopes), and integrating a large inspection hatch. Engineering the hatch: seal compression stops, water flow ramps, and dual retention systems (bungee & mechanical). Designing the integrated sump with a hair trap and carbon fiber drain tube. Using 3D scanning to verify CAD models against the actual, irregular hull geometry for critical component placement (like the toilet). Preparing the CAD model for 3D printing: splitting the mould, print settings for vacuum infusion (shells, infill), and lessons on material consistency. This video is for makers, boat builders, and anyone interested in the hybrid process of blending traditional problem-solving with modern digital fabrication tools. CHAPTERS: 00:00 - Intro: Cardboard to CAD 01:30 - 2D CAD Overview & Drainage Planning 03:15 - 3D CAD Deep Dive: Floor Falls & Wedges 06:45 - Hatch Design: Seals, Compression Stops & Geometry 12:10 - Sump & Drain Design 15:30 - Integrating Other Components (Toilet, Plumbing) 18:45 - Verifying with 3D Scanning 23:20 - From CAD to 3D Printed Mould 27:00 - 3D Print Setup & Settings for Tooling 29:50 - Process Recap & Conclusion USEFUL LINKS ➜ Supporting blog post https://youngbarnacles.com/boat-shower-floor-design-cad-3d-scan-print-workflow/ ➜ Want to go deeper? Access our detailed composites videos, project files, and community on the Youngbarnacles Members Hub: https://youngbarnacles.com/plans/all-access-memberships/ ➜ Need world-class engineering for your project? Learn more about our professional design and consultancy services at SYAS Performance: https://syasperformance.weebly.com/ ➜ Free Sailing Library: Check out our free guides on composites, systems, and seamanship: https://www.youngbarnacles.com/resources MUSIC YouTube Audio Library ➜ https://www.youtube.com/ SAFETY DISCLAIMER: PROFESSIONAL WORK This video documents professional marine work with significant risk of injury or vessel damage. This is NOT DIY instruction. You are solely responsible for your own safety and actions. We are not liable for any application of this information. Full Disclaimer: https://youngbarnacles.com/website-disclaimer/

Welcome back to the bilges! This week, we're deep in the design phase of a problem every boat owner faces: the shower floor. Forget standard construction—on a boat, you're battling changing trim, mandatory inspection hatches, and the nightmare of a failed pump flooding the bilge. We break down our custom solution, designed from scratch. In this episode, we cover: • The core challenge: creating proper drainage fall on a level base. • Why the pump must be in a separate compartment (and the "floating lid" logic). • Designing an integrated inspection hatch with a gutter and drain. • Our "valley" solution to handle the boat's fore/aft trim. • From Cardboard Assisted Design (CAD) to computer modeling. CHAPTERS: 00:00 - Intro: Welcome Back to the Bilges 01:01 - The Challenge: Creating Fall on a Level Base 01:24 - The Core Drivers: Drainage & Underfloor Access 02:34 - The Integrated Hatch & Drain Design 04:02 - Designing for Trim: The "Valley" Solution 05:15 - Why the Pump is NOT Under the Shower 06:20 - Problem #1: Hair & The "Floating Lid" Filter 08:41 - Problem #2: Serviceability & Easy Pump Access 11:18 - On-Site Mockup: CAD = Cardboard Assisted Design 13:00 - Hatch Mechanics: Seals, Steps, and Tool-Free Removal 16:05 - Systems Planning: Hoses, Wires & Avoiding Swiss Cheese 18:54 - From Cardboard to Computer: The Value of Physical Mockups 22:17 - Next: The Computer CAD Model & 3D Scanning USEFUL LINKS ➜ Supporting blog post https://youngbarnacles.com/boat-shower-floor-design-blueprint/ ➜ Want to go deeper? Access our detailed composites videos, project files, and community on the Youngbarnacles Members Hub: https://youngbarnacles.com/plans/all-access-memberships/ ➜ Need world-class engineering for your project? Learn more about our professional design and consultancy services at SYAS Performance: https://syasperformance.weebly.com/ ➜ Free Sailing Library: Check out our free guides on composites, systems, and seamanship: https://www.youngbarnacles.com/resources MUSIC YouTube Audio Library ➜ https://www.youtube.com/ SAFETY DISCLAIMER: PROFESSIONAL WORK This video documents professional marine work with significant risk of injury or vessel damage. This is NOT DIY instruction. You are solely responsible for your own safety and actions. We are not liable for any application of this information. Full Disclaimer: https://youngbarnacles.com/website-disclaimer/
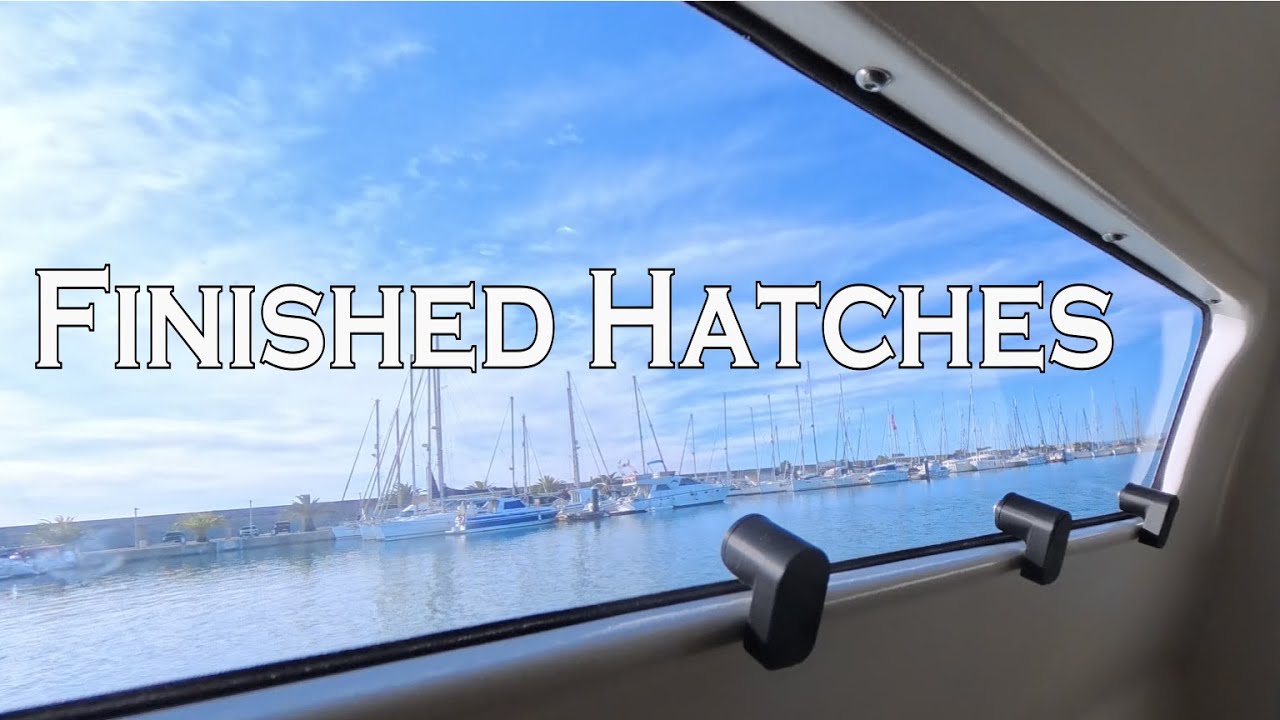
In this boat building episode, we reach a major milestone: installing the transparent acrylic lenses into our custom-built hatches! Watch the step-by-step process of making our boat watertight and bringing in natural light. We also tackle critical water management by designing and installing custom 3D-printed hatch drains, explain why MS Polymer Sealant is better than urethane for this job, and continue fairing the galley and doorways. CHAPTERS: 00:00 – Intro & Hatch Lenses Have Arrived! 01:00 – Visual Progress & Project Overview 01:38 – Hatch Drain Design & Installation Explanation 05:40 – Sanding & Prepping the Drain Area 07:10 – Gluing the 3D-Printed Drain & Using Foam Inserts 09:04 – Installing the First Acrylic Hatch Lens 11:48 – MS Sealant vs. Urethane – Which is Better? 14:44 – Clamping & Sealing the Lens 16:15 – Cat Inspector in the New Shower Pan! 19:04 – Finished USEFUL LINKS ➜ Supporting blog post https://youngbarnacles.com/acrylic-hatch-lenses/ ➜ Want to go deeper? Access our detailed composites videos, project files, and community on the Youngbarnacles Members Hub: https://youngbarnacles.com/plans/all-access-memberships/ ➜ Need world-class engineering for your project? Learn more about our professional design and consultancy services at SYAS Performance: https://syasperformance.weebly.com/ ➜ Free Sailing Library: Check out our free guides on composites, systems, and seamanship: https://www.youngbarnacles.com/resources MUSIC YouTube Audio Library ➜ https://www.youtube.com/ SAFETY DISCLAIMER: PROFESSIONAL WORK This video documents professional marine work with significant risk of injury or vessel damage. This is NOT DIY instruction. You are solely responsible for your own safety and actions. We are not liable for any application of this information. Full Disclaimer: https://youngbarnacles.com/website-disclaimer/

Deep dive into a practical fiberglass repair. When we removed the floors in Paikea's port side, we found classic core damage: delamination and a shear crack from an old impact. We had aleady fixed the same sort of problem on the starboard side so now its time to fix the damage in the port hull. CHAPTERS: 0:00 Introduction: When a Simple Job Reveals More 1:15 Damage Discovery: The Cracked Bulkhead 2:45 Forensic Tapping: Mapping the Delamination 4:30 Understanding the Failure: Core Shear & Impact Damage 6:00 Engineering the Repair: Slurry Formulation & Application 8:45 Structural Upgrade: Fabricating the New Bulkhead 12:30 Precision Fit: Templating the New Cabin Sole 15:00 Final Installation: Bedding the Composite Floor 17:30 Closeout: Weight Audit & Methodology Review This is essential knowledge for any boat owner or builder dealing with hull or deck repairs. The principles apply to any cored composite structure! USEFUL LINKS ➜ Supporting blog post https://youngbarnacles.com/ ➜ Want to go deeper? Access our detailed composites videos, project files, and community on the Youngbarnacles Members Hub: https://youngbarnacles.com/plans/all-access-memberships/ ➜ Need world-class engineering for your project? Learn more about our professional design and consultancy services at SYAS Performance: https://syasperformance.weebly.com/ ➜ Free Sailing Library: Check out our free guides on composites, systems, and seamanship: https://www.youngbarnacles.com/resources MUSIC YouTube Audio Library ➜ https://www.youtube.com/ SAFETY DISCLAIMER: PROFESSIONAL WORK This video documents professional marine work with significant risk of injury or vessel damage. This is NOT DIY instruction. You are solely responsible for your own safety and actions. We are not liable for any application of this information. Full Disclaimer: https://youngbarnacles.com/website-disclaimer/

This episode documents the removal of a leaking forward deck hatch aboard Paikea and the process of filling and structurally rebuilding the opening. The hatch over Harry’s bunk had been a long-term source of water ingress. Rather than replacing it like-for-like, we decided to remove the opening entirely and move ventilation to a side port light positioned under the gunwale, where it’s protected from direct rain and green water. The video covers: Why this hatch was removed rather than replaced Cutting and filling the deck opening Foam fitting in a cambered deck Hand laminating versus infusion trade-offs Laminate thickness, resin choice, and consolidation Why closing the opening significantly stiffens the deck panel This isn’t presented as a universal solution. It’s a record of one specific structural decision on Paikea, made within the constraints of time, access, and how the boat is actually used offshore. CHAPTERS: 00:00 Cutting another hole in the boat – why this hatch matters 01:00 Why the forward hatch keeps leaking 01:02 Decision: filling the hatch instead of replacing it 4:54 Two hatches in – preparing to fill Harry’s hatch 7:14 Shaping foam to match deck camber 09:01 Cold conditions and curing the foam 11:38 Hand laminating vs infusion (and time pressure) 15:27 Can you walk on it yet? (skin structure explained) 19:49 Overhead work and inside skin plans 01:20:00 Why the outside wasn’t infused 21:00 3D infusion explained (and why it wasn’t done here) 24:20 Infusion pleats explained – avoiding resin ridges SAFETY DISCLAIMER: PROFESSIONAL WORK This video documents professional marine work with significant risk of injury or vessel damage. This is NOT DIY instruction. You are solely responsible for your own safety and actions. We are not liable for any application of this information. Full Disclaimer: https://youngbarnacles.com/website-disclaimer/ USEFUL LINKS ➜ Supporting blog post https://youngbarnacles.com/ ➜ Want to go deeper? Access our detailed composites videos, project files, and community on the Youngbarnacles Members Hub: https://youngbarnacles.com/plans/all-access-memberships/ ➜ Need world-class engineering for your project? Learn more about our professional design and consultancy services at SYAS Performance: https://syasperformance.weebly.com/ ➜ Free Sailing Library: Check out our free guides on composites, systems, and seamanship: https://www.youngbarnacles.com/resources MUSIC YouTube Audio Library ➜ https://www.youtube.com/

Bulkhead reinforcement isn’t about adding more fibreglass—it’s about understanding how loads actually move through a boat. In this video, we reinforce a small but critical section of bulkhead on Paikea, our Lock Crowther Catana 42s, and use it to explain: Why bulkheads act as structural beams How span, depth, and stiffness dictate laminate design When uni-directional fibre is required (and when it isn’t) The difference between edge capping and true structural reinforcement Why we chose polyester and E-glass instead of carbon and epoxy Real-world trade-offs between performance, cost, and practicality. This is not a cosmetic refit. It’s structural work driven by basic beam theory and offshore reality. If you’re refitting a multihull—or assessing one—this is the kind of detail that matters. CHAPTERS 00:00 Why this bulkhead matters 02:10 Are we creating an I-beam? 05:40 Span vs depth explained 09:30 Uni-directional fibre vs edge capping 14:10 Deflection vs strength 18:45 Material choices: polyester vs epoxy 23:10 Doors, openings, and structure 26:40 Final laminate and edge capping USEFUL LINKS ➜ Supporting blog post https://youngbarnacles.com/ ➜ Want to go deeper? Access our detailed composites videos, project files, and community on the Youngbarnacles Members Hub: https://youngbarnacles.com/plans/all-access-memberships/ ➜ Need world-class engineering for your project? Learn more about our professional design and consultancy services at SYAS Performance: https://syasperformance.weebly.com/ ➜ Free Sailing Library: Check out our free guides on composites, systems, and seamanship: https://www.youngbarnacles.com/resources MUSIC YouTube Audio Library ➜ https://www.youtube.com/ SAFETY DISCLAIMER: PROFESSIONAL WORK This video documents professional marine work with significant risk of injury or vessel damage. This is NOT DIY instruction. You are solely responsible for your own safety and actions. We are not liable for any application of this information. Full Disclaimer: https://youngbarnacles.com/website-disclaimer/

Stuck in the marina but want to use your boat's solar power first? Tired of paying for shore power while your panels sit idle? In this video, we reconfigure our Victron MultiPlus inverter/charger to PRIORITISE our solar and battery bank, making grid power an automatic, conditional backup. We’ll walk through the two key advanced settings: AC Input Control and Prioritise Other Energy Sources. Learn how to set load and voltage thresholds so your boat runs as an independent "island," only tapping into shore power for heavy tools or when batteries are low. We even do a live test with a vacuum cleaner to show the seamless switchover in action. CHAPTERS: 00:00 The Problem: Shore Power as Default 01:15 The Goal: Solar & Battery as Primary Source 02:30 Accessing Victron Advanced Settings (VE Connect) 04:10 Key Setting #1: AC Input Control (Conditional Connection) 07:25 Setting Load & Voltage Triggers 09:40 Key Setting #2: Prioritise Other Energy Sources 12:15 The Override Button & Charger Behaviour 14:05 REAL-WORD TEST: Vacuum Cleaner Demo 17:00 Benefits: Cost, System Health, & Mindset 18:45 Important Considerations & Trade-offs CREDIT & THANKS: A special thanks to Jason Ellis for the crucial tip that pointed us in the right direction. If you're looking for expert marine electrical advice, you can contact Jason at captjasonellis@gmail.com. USEFUL LINKS ➜ Supporting blog post https://youngbarnacles.com/prioritising-solar-over-shore-power-victron-setup/ ➜ Want to go deeper? Access our detailed composites videos, project files, and community on the Youngbarnacles Members Hub: https://youngbarnacles.com/plans/all-access-memberships/ ➜ Need world-class engineering for your project? Learn more about our professional design and consultancy services at SYAS Performance: https://syasperformance.weebly.com/ ➜ Free Sailing Library: Check out our free guides on composites, systems, and seamanship: https://www.youngbarnacles.com/resources MUSIC YouTube Audio Library ➜ https://www.youtube.com/ SAFETY DISCLAIMER: PROFESSIONAL WORK This video documents professional marine work with significant risk of injury or vessel damage. This is NOT DIY instruction. You are solely responsible for your own safety and actions. We are not liable for any application of this information. Full Disclaimer: https://youngbarnacles.com/website-disclaimer/

This is the reality of a professional-level refit: the long, meticulous, and often messy work that happens before the paint goes on. There's no glory in fairing, but it's what separates a quality finish from a amateur one. In this Paikea refit update, we're deep in the "unsexy" phase: prepping the entire port-side interior for paint. This means endless sanding, filling old penetrations, and—as always—uncovering and fixing unexpected problems, like a major leak in a cockpit locker. Join us as we tackle the essential but unseen work that transforms a structural shell into a finished, seaworthy interior. CHAPTERS: 00:00 The "Unsexy" Reality of Boat Refits 00:45 Touring the Port Hull Progress 02:15 Installing Flush Hatches & 3D-Printed Drains 04:10 The Systematic Sanding & Fairing Process 06:30 Widening Doorways & Composite Edge Capping 08:15 The Weight Reduction Spreadsheet: 650kg Lighter 09:50 Discovering a Hidden Hole & Rotten Core 12:40 The "Easy" Solution vs. The "Hard" Solution 14:25 Laminating the Repair 15:00 The Final Push for Paint Prep SAFETY DISCLAIMER: PROFESSIONAL WORK This video documents professional marine work with significant risk of injury or vessel damage. This is NOT DIY instruction. You are solely responsible for your own safety and actions. We are not liable for any application of this information. Full Disclaimer: https://youngbarnacles.com/website-disclaimer/ USEFUL LINKS ➜ Supporting blog post https://youngbarnacles.com/unglamorous-boatwork-fairing-fixing-leaks/ ➜ Want to go deeper? Access our detailed composites videos, project files, and community on the Youngbarnacles Members Hub: https://youngbarnacles.com/plans/all-access-memberships/ ➜ Need world-class engineering for your project? Learn more about our professional design and consultancy services at SYAS Performance: https://syasperformance.weebly.com/ ➜ Free Sailing Library: Check out our free guides on composites, systems, and seamanship: https://www.youngbarnacles.com/resources MUSIC YouTube Audio Library ➜ https://www.youtube.com/

We're hitting a major milestone in the Paikea refit: installing the composite flush hatches and painting the inside. But this video is about more than just finishing work. We'll show you the tangible results of our weight-saving mission—we've already removed 650kg, putting us well on our way to our goal of shedding a full ton. In this update, you'll see: • The final installation of our custom-designed composite hatches. • The 3D-printed drainage systems that make them work. • The extensive prep and painting of the hull sides. • The interior progress, including new composite bulkheads and structure. CHAPTERS: 00:00 Hull Weight & Waterline Progress 01:15 The Goal: Removing a Ton of Weight 02:45 Interior Refit & Composite Structure Update 05:25 Carbon Fibre Hardtop Finishing 06:00 Foredeck & Fuel Locker Prep 06:30 Installed Composite Hatches & Drainage 08:15 Final Pre-Paint Prep & Fairing 09:45 Painting the Hull Sides 11:45 Explaining Hatch Drainage Systems SAFETY DISCLAIMER: PROFESSIONAL WORK This video documents professional marine work with significant risk of injury or vessel damage. This is NOT DIY instruction. You are solely responsible for your own safety and actions. We are not liable for any application of this information. Full Disclaimer: https://youngbarnacles.com/website-disclaimer/ USEFUL LINKS ➜ Supporting blog post https://youngbarnacles.com/paikea-refit-weight-reduction/ ➜ Want to go deeper? Access our detailed composites videos, project files, and community on the Youngbarnacles Members Hub: https://youngbarnacles.com/plans/all-access-memberships/ ➜ Need world-class engineering for your project? Learn more about our professional design and consultancy services at SYAS Performance: https://syasperformance.weebly.com/ ➜ Free Sailing Library: Check out our free guides on composites, systems, and seamanship: https://www.youngbarnacles.com/resources MUSIC YouTube Audio Library ➜ https://www.youtube.com/

This video documents two key upgrades in the Paikea refit: the professional installation of custom deck hatches and the complete replacement of leaky portlights on our Catana 42 catamaran. In the first half, see the process of fitting and aligning a new composite deck hatch, focusing on the use of 3D-printed jigs for perfect hinge placement. The second half covers the engineering behind converting failed, inward-opening portlights into outward-opening hatches with integrated gutter drainage. The focus is on professional methodology, from solving deck curvature challenges to implementing permanent, watertight solutions. CHAPTERS: 0:00 Introduction: Fitting Composite Hatch Rim 1:00 Deck Hatch: Cutting the Deck & Fitting the Frame 4:10 Using 3D-Printed Jigs for Precision Hinge Alignment 6:45 Drilling Hinge Holes with Custom Fixtures 11:30 Portlight Replacement: Removing Old Units & Cutting New Openings 13:00 The New Hatch Design: Integrated Gutter & Drainage 16:45 Final Installation of Side Hatches 19:30 Detailing: 3D-Printed Drain Fittings SAFETY DISCLAIMER: PROFESSIONAL WORK This video documents professional marine work with significant risk of injury or vessel damage. This is NOT DIY instruction. You are solely responsible for your own safety and actions. We are not liable for any application of this information. Full Disclaimer: https://youngbarnacles.com/website-disclaimer/ USEFUL LINKS ➜ Supporting blog post https://youngbarnacles.com/professional-boat-hatch-installation/ ➜ Want to go deeper? Access our detailed composites videos, project files, and community on the Youngbarnacles Members Hub: https://youngbarnacles.com/plans/all-access-memberships/ ➜ Need world-class engineering for your project? Learn more about our professional design and consultancy services at SYAS Performance: https://syasperformance.weebly.com/ ➜ Free Sailing Library: Check out our free guides on composites, systems, and seamanship: https://www.youngbarnacles.com/resources MUSIC YouTube Audio Library ➜ https://www.youtube.com/

This video shows the complete process of building our composite hatches, from the 3D printed custom molds to the final lamination. We demonstrate how we created two separate 3D printed molds—one for the hatch lid and one for the gutter/frame—and walk through the entire build sequence: mold preparation, gel coating, fiberglass lamination, and post-processing. This method provides a practical solution for creating strong, complex composite parts with precise geometry without expensive tooling. CHAPTERS: 0:00 Introduction: Hatch Lid & Frame Molds 1:30 Designing & Printing the Modular Molds 4:15 Mold Prep: Wax, Plasticine, and Sealing 8:05 Applying Gel Coat as a Primer Layer 11:20 Fiberglass Lamination Setup 14:50 Demolding the Hatch Lid and Frame 18:25 Post-Processing & Trimming the Parts 22:00 Dry-Fit Assembly & Next Steps SAFETY DISCLAIMER: PROFESSIONAL WORK This video documents professional marine work with significant risk of injury or vessel damage. This is NOT DIY instruction. You are solely responsible for your own safety and actions. We are not liable for any application of this information. Full Disclaimer: https://youngbarnacles.com/website-disclaimer/ USEFUL LINKS ➜ Supporting blog post https://youngbarnacles.com/composite-hatch-build/ ➜ Want to go deeper? Access our detailed composites videos, project files, and community on the Youngbarnacles Members Hub: https://youngbarnacles.com/plans/all-access-memberships/ ➜ Need world-class engineering for your project? Learn more about our professional design and consultancy services at SYAS Performance: https://syasperformance.weebly.com/ ➜ Free Sailing Library: Check out our free guides on composites, systems, and seamanship: https://www.youngbarnacles.com/resources MUSIC YouTube Audio Library ➜ https://www.youtube.com/

After 32 years, Paikea's original deck hatches were leaking, heavy, and difficult to service. Rather than opting for an off-the-shelf solution with its own compromises, we engineered a complete composite hatch system from scratch. This video details the design philosophy and engineering behind our new hatches, covering: The analysis of why commercial hatches failed to meet our specific needs for offshore sailing. The critical design elements: flush mounting, integrated gutters, and a structural rim that reinforces the deck. The development of custom 3D-printed nylon-carbon friction hinges for ultimate serviceability. How a circular lens reduces weight and heat gain while maintaining strength. The final result: a hatch system that is half the weight of the original, fully flush, and designed to meet ISO/ABS standards. This is applied marine engineering for a real-world refit problem. CHAPTERS: 0:00 - The Problem with Original Hatches 2:15 - Why Commercial Hatches Weren't the Solution 5:30 - The Design Brief: Waterproof, Flush, Serviceable 8:10 - The Structural Rim & Deck Reinforcement 11:25 - Seal Geometry & Gutter Design Explained 14:40 - Custom 3D-Printed Friction Hinges 18:15 - The Lid: Safety, Weight, and Lens Rationale 22:00 - Prototyping & 3D-Printed Molds 25:30 - The Final Weight: 3kg vs 5.7kg (Original) USEFUL LINKS ➜ Supporting blog post https://youngbarnacles.com/engineering-composite-flush-hatches/ ➜ Want to go deeper? Access our detailed composites videos, project files, and community on the Youngbarnacles Members Hub: https://www.youngbarnacles.com ➜ Need world-class engineering for your project? Learn more about our professional design and consultancy services at SYAS Performance: https://syasperformance.weebly.com/ ➜ Free Sailing Library: Check out our free guides on composites, systems, and seamanship: https://www.youngbarnacles.com/resources MUSIC YouTube Audio Library ➜ https://www.youtube.com/

We're tackling one of the biggest challenges of living on a boat: creating functional storage without adding weight. In this episode, we design, build, and install a custom composite shelf and cupboard unit in our sailboat's cabin. You'll see the entire process, from the initial challenge of "eyeballing" the fit in a space with countless angles, to cutting composite panels with the right blades, and the time-saving trick of pre-painting components before installation. We focus on making it as strong and lightweight as possible, with the final primed shelf weighing just 1.55kg! What you'll learn in this video: The challenge of making things look right vs. being technically right on a boat. How to choose the right jigsaw blades for cutting carbon fibre and composite panels. Our method for gluing and assembling composite parts on the bench. Why we prime and paint before installing components in tight spaces. Using peel ply for a perfect finish on fibreglass tape. This custom shelf adds crucial storage for books and gear, integrates into the boat's structure, and proves that you don't have to sacrifice function for performance. YouTube Video Chapters 00:00 - 01:00: Introduction: Maximizing Space on a Boat The host introduces the episode's goal: to show the design and construction of lightweight, strong cupboards and shelves. 01:00 - 04:16: The Challenge of "Eyeballing" in a Boat Fitting the shelf in a space with many conflicting angles and slopes. The importance of making it look right, not just be technically correct. 04:16 - 06:06: Cutting Composite Panels: Tools & Blades A discussion on the best tools and jigsaw blades for cutting carbon fibre and composite materials without damaging them. 06:06 - 07:14: First Fit Check and Scribing Checking the first cut, dealing with gaps, and explaining how composites allow for filling and fixing imperfections. 07:14 - 11:14: Gluing, Assembling, and Pre-Painting Assembling the shelf unit on the bench and the clever step of priming it before installation to save time. 11:14 - 13:13: The Weight & Pre-Painting Advantage Weighing the finished shelf (1.55kg) and explaining the benefits of pre-painting hard-to-reach areas. 13:13 - 15:04: Final Glue-In and Taping The shelf is glued into place. Using peel ply on the tape for a smooth, easy-to-finish surface. 15:04 - 16:43: Fairing, Sanding, and Final Thoughts The final stages of fairing and sanding. Recap of the benefits: functional, lightweight, custom storage. 16:43 - 18:49: Project Wrap-Up & Teaser for Next Week The finished painted shelf. A teaser for the next video topic: designing and building custom composite hatches to solve water leakage issues. Teaser for Next Video: We're solving a major issue on board next time: keeping the wet stuff out! We'll dive into the design and build of our own custom composite hatches. What's with the mysterious hole in the middle? You'll have to wait and see! Youngbarnacles Membership: Go beyond YouTube. Get detailed tutorials and a community for serious learners. www.youngbarnacles.com SYAS Performance: Our professional design & engineering consultancy for advanced composites, hydrofoils, and owner's representation. https://syasperformance.weebly.com/ Music from https://www.youtube.com/

Can you fix an imploded part post infusion? Watch this week as we show you how we went about saving our infused and imploded box beam from the rubbish bin. Shayne is back to show you all how he went about achieving the impossible and repairing an infusion gone wrong. MORE INFORMATION can be found on our website https://youngbarnacles.com MUSIC https://www.youtube.com/

