

Latest videos
Thinking about earning your captain's license? Mariners Learning System: https://marinerslearningsystem.com/?rfsn=9072285.32c540&utm_source=refersion&utm_medium=affiliate&utm_campaign=9072285.32c540 Use code MJSAIL200PACK for $200 off the OUPV course. Use code MJSAIL300MASTER for $300 off the Master's course. Special Father's Day Sale: 30% off sitewide through June 18th with code MJSAIL30DAD This week we're continuing the long process of preparing our catamaran for paint. What looks like a simple coat of primer is actually the result of countless hours spent sanding, guide coating, filling low spots with fairing compound, and sanding all over again. While Matt focuses on the cabin top, I revisit our interior paint testing after being unhappy with the sheen level of our previous Alexseal Pegasus Gray samples. That means sanding off old test panels and trying once again to achieve the finish we're looking for before committing to larger areas of the boat. I'm also making a big decision regarding my captain's license. Originally, I planned to wait until after launch, but with our Greece charter coming up this fall—and some of my qualifying sea time nearing its expiration date—I've decided it's time to get serious about earning my license now. Want to join us in Greece this fall? Odyssey Sailing Festival: https://www.theoceancruisers.com/odyssey We'll be captaining a Bali 4.4 around the Greek Islands, and at the time of publishing this video we still have one bunk available for anyone who would like to join us. Thank you for following along as we continue building our dream catamaran from the ground up. --- Want to support the build? Patreon: https://www.patreon.com/mjsailing Our Website: https://www.mjsailing.com Instagram: https://www.instagram.com/mattandjessicasailing Facebook: https://www.facebook.com/mjsailing Amazon Storefront: https://www.amazon.com/shop/mjsailing Music Provided By: https://www.epidemicsound.com
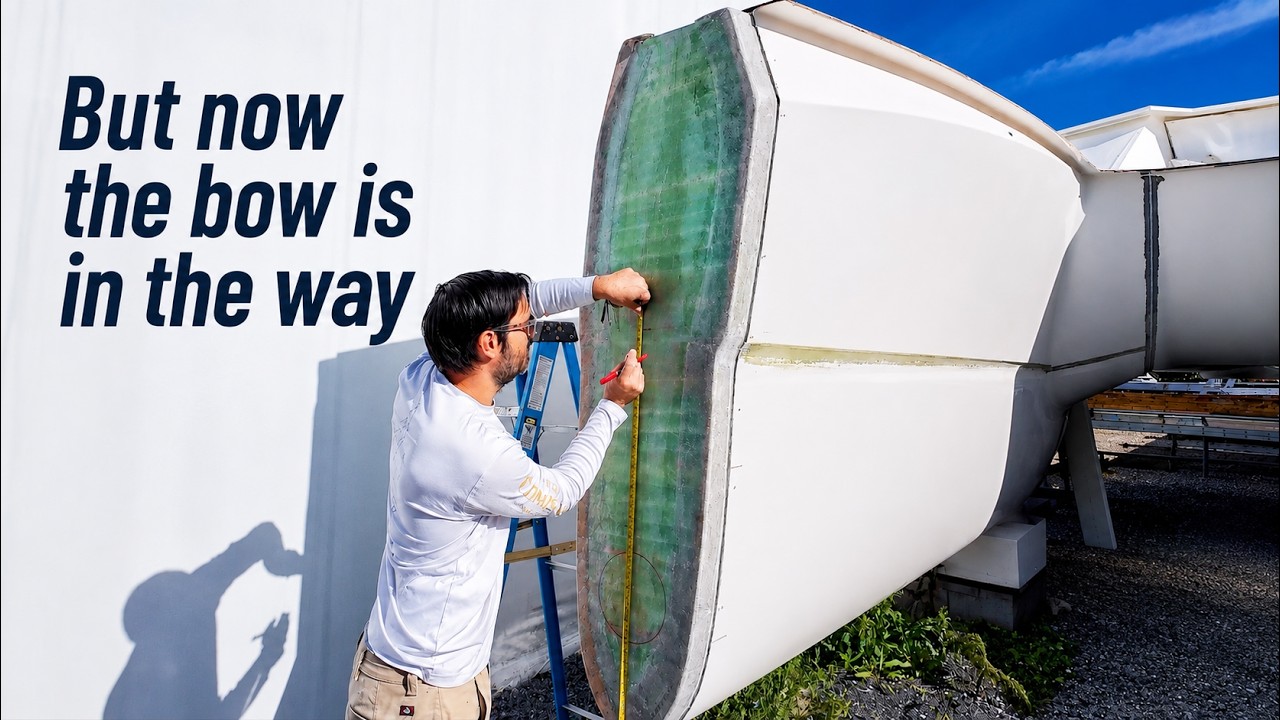
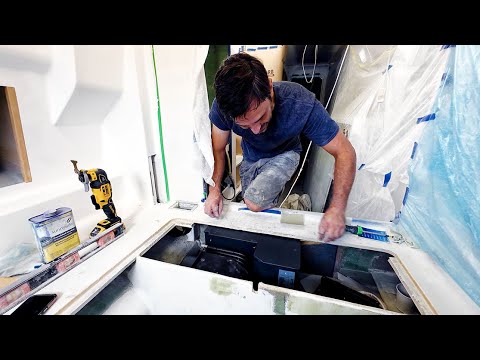
Take a look at Fitnexa Somnipods 3: https://www.fitnexa.com/ We hope you're having a great second half of May!! It looks like we missed all of our April Showers here on Kent Island, and they were saved up for the past week. So...we didn't get as far as we wanted to in some projects, but here is what we have been able to do since you've seen us last. With weather right in that sweet spot of not sweating in enclosed spaces, but warm enough to let resin cure, Matt has gone into the bow lockers to glass in a new bulkhead. As he'll explain in more detail, it was four inches off, which is only a big deal because it needs to be where the forebeam connects both bows, giving it extra strength. The bow shown in the photo above had already been fully glassed in, and with the nose cones on, made it a much harder space for us to work in. Last month I went in with an oscillating tool and cut out the center, leaving a three in ring. Then, Matt came in with a new bulkhead and glassed that in just slightly aft. It's not completely finished yet, but since we've been able to fix this mistake, we can now admit we made it, lol. On my work, I've been continuing to smooth out the cabin top so it will be ready for our AlexSeal topcoat paint soon. Having gone through with the power sander originally I thought everything looked good and I'd be flying through it, but a later check with a guide coat and blocks made me see there were a number of spots that need to be filled and blended in. Hopefully the one round of fairing will be enough and then I can get started on the starboard side, but at least this is giving us a great idea of what to expect on the hull when we go to fair and get it ready for its colored exterior. We hope you enjoy!!

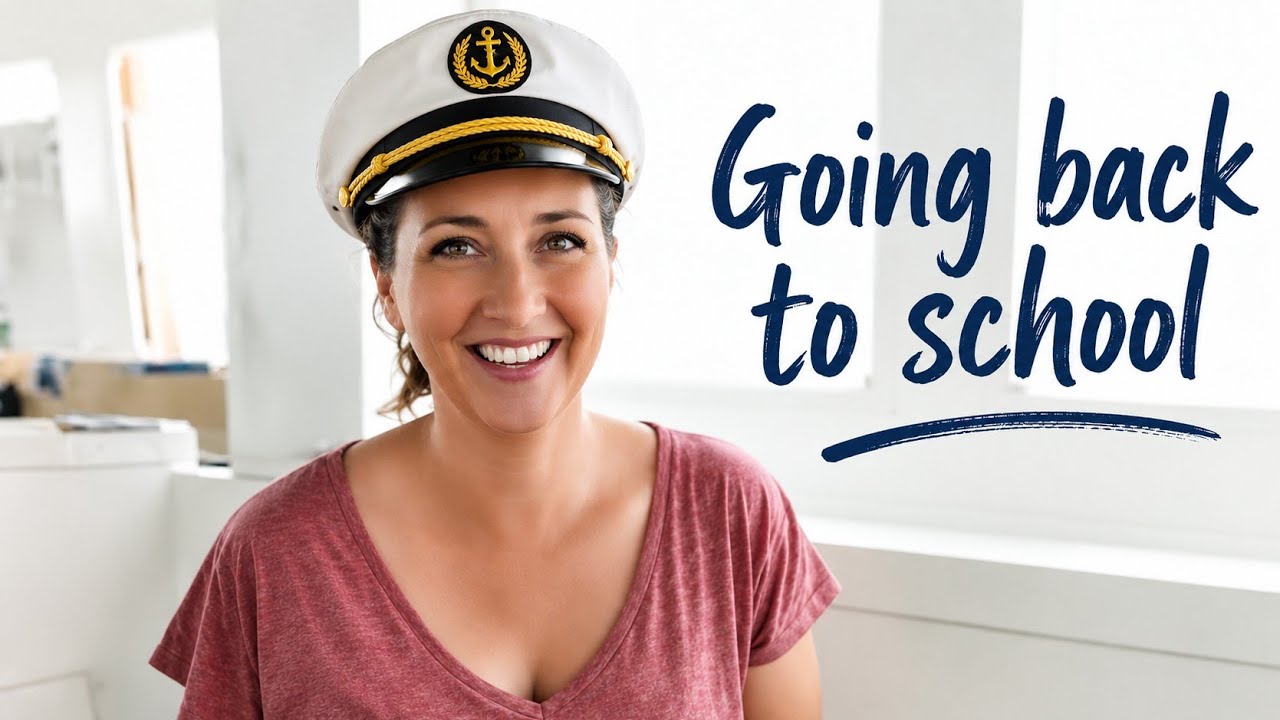
Finally starting the process of getting my captain’s license ⚓📚 With a charter for us coming up in Greece this fall, I knew I couldn’t keep putting it off any longer — so I’ve officially started the Mariners Learning System courses. One thing I really like so far is that everything is online and self-paced, so I can study wherever I am and fit it around boat work and everyday life. Plus the built-in quizzes and study tools make it much easier to retain the information. If you’ve been thinking about getting your captain’s license too, Mariners Learning System is currently offering 30% off with our code MJSAIL30MEM.

This week we’re giving you a full walkthrough of our homebuilt catamaran to show just how much progress has happened lately. When you work on a project every single day, it’s hard to notice the small changes — but once we started walking through each space, even we were surprised by how far things have come. Along the way, we’ll show some of the projects we completed over the winter that never made it into an episode, including repainting all of the cabinets (because apparently I couldn’t leave them alone 😅), updates to the engine rooms, and some of the systems now being prepared for hoses, pumps, and plumbing. We also talk about a few areas currently on hold while we wait for materials and supplies to arrive. Before the walkthrough, I start tackling one of the biggest exterior jobs yet: prepping the cabin top for paint. Since we decided to move away from gelcoat and paint the boat instead, we now need to sand away the glossy surface and identify any low spots before primer can begin. Thankfully, the first test sections went much better than expected. After using a guide coat to check fairness, we found far fewer low spots than we were bracing ourselves for — which hopefully means a lot less sanding when we move on to the hull sides next spring. Every step gets us a little closer to launch day. We hope you enjoy the episode! Jessica & Matt

Save $30 on your Airlock purchase of $199 or more by using code MJSAILING or our link below. If you’ve ever dealt with that musty “boat smell,” this is one of the easiest ways to keep your air fresh and clean on board. https://www.airlockusa.com/?sca_ref=11115718.vGu5Y94mh5w&utm_source=affiliate&utm_medium=affiliatelink&utm_campaign=prom This week we’re diving deeper into the electrical system on our catamaran build—and realizing just how much heat these components can generate if we’re not careful. As we start laying out the electrical cabinet, Matt walks through the placement of our DC-to-DC converters, solar controllers, and Victron components, all while trying to manage airflow, spacing, and long-term serviceability. With multiple high-load systems running in a confined space, keeping everything cool becomes just as important as getting it wired correctly. We’re also making progress on the hybrid system, mapping out cooling lines, mounting components, and figuring out the best placement for heavier items like the isolation transformer to help keep the boat properly balanced. Of course, it wouldn’t be a build episode without a few setbacks. A missed paint step means pulling everything back out, and some of our original layout plans had to change once we saw how everything actually fit in place. It’s all part of the process—but step by step, the systems that will power this boat are starting to come together. We hope you enjoy!! Much love, Jessica & Matt Amazon Wishlist https://www.amazon.com/hz/wishlist/ls/2B2BOYEH9THAH/ref=nav_wishlist_lists_1 If you have spring projects on your own boat and would like 5% off your purchase of Total Boat products, make sure to use our link here! https://www.totalboat.com/MJSailing Link to our boat: https://maxcruisemarine.com/ Thank you SO MUCH to our Patrons. These amazing supporters help keep us on the boat, our camera equipment up to date, and the videos coming. Without our patrons, these videos would not be possible. To join the Patreon ranks, please visit: / mjsailing or Buy us a beer through PayPal! https://www.paypal.me/MJSailing or Help contribute to the build by shopping our Amazon Wish List! https://www.amazon.com/hz/wishlist/ls... Delivery address: Kentmorr Marina 910 Kentmorr Road Stevensville, MD 21666 Thank you!, Matt & Jessica Videos made by Jessica, featuring Matt. 00:00 Intro & 5-Year Build Reality Check 00:22 Electrical Cabinet Planning Begins 01:10 DC-to-DC Controllers & Heat Concerns 02:05 Spacing, Airflow & Mounting Strategy 03:15 Prioritizing High-Load Components 04:25 Solar Controllers & System Layout 05:27 What Causes “Boat Smell”? (Airlock Integration) 06:15 How Airlock Ionization Works 07:10 Simple Install Inside AC System 08:06 Electrical Cabinet Layout Continued 08:45 Cerbo GX & Communication Wiring 09:30 Designing for Serviceability & Access 10:20 Rethinking Airflow (No Door Design) 11:50 Ventilation Strategy & Heat Extraction 12:40 Hybrid Motor Controller Placement Problem 13:30 Access vs Space Tradeoffs 14:20 Wiring Runs & Temporary Mounting Plan 15:38 Hybrid System Plumbing Explained 16:20 Seawater Cooling Loop Walkthrough 17:15 Coolant Loop & System Flow 18:10 Engine Bay Layout Progress 19:00 Weight Distribution & System Placement 20:00 Isolation Transformer Relocation 21:00 ABYC Standards & Shore Power Setup 22:10 Mounting with Adhesive Studs 23:52 Wrapping Up & Next Steps Music: A Travelers' Gloom - Dew of Light Gemini - Nevin Sunset Road - Marc Torch Pandemonium (Tribute Version) - The Mondays Camera equipment used: Google Pixel 9 DJI Action 4 Previous Boats: 1983 Trisalu 37 - custom aluminum, built in Quebec (Elements of Life) Where we've been: 2.5 year refit in Indiantown, Florida; Abacos, Bahamas; St. Barth's; St. Maarten; Antigua; Saba; Azores; Ireland; Scotland; Norway; England 1989 Sabre 34 Targa (Serendipity) Where We Sailed Her: U.S. - Bahamas - Jamaica - Cuba - Cayman Islands - Honduras - Guatemala - Belize - Mexico - Bermuda - Azores - Madeira - Canary Islands - Sint Maarten - BVI's - USVI's Editing software: Adobe Premier Pro Website: http://www.mjsailing.com Facebook: / mattandjessicasailing Instagram: / mattandjessicasailing & / mj_wayfaring

This one cabinet will eventually power our entire catamaran. Last episode we installed our two Victron MultiPlus II units, officially kicking off the installation of our electrical system. Now we’re moving on to the cabinet where all of our breakers will live — the place that will ultimately distribute power to every major system on board. And there are a lot of them. Matt has spent years planning out this system, carefully considering not only what each breaker will power, but also where each one should be placed so the panel is logical and easy to use once we’re living aboard full time. In this episode we start laying out and installing the breakers that will eventually control everything from lighting and navigation electronics to pumps and onboard systems. It’s one more step toward bringing the electrical system to life. We also want to give a huge thank you to everyone who purchased wire from our Amazon wish list. Your support helps keep this project moving forward, and we’re incredibly grateful to have such an amazing community behind us as we build this boat. We’re already working on the next round of projects for the boat, and while they’re not quite ready to show yet, they’re well underway and will be coming in the next episode. Subscribe to follow along as we continue building our performance cruising catamaran from the ground up. The next stage of the build will involve running a lot of wire throughout the boat. If you’d like to help support that part of the project, we’ve added many of the cables and supplies we need to our Amazon wishlist: Amazon Wishlist https://www.amazon.com/hz/wishlist/ls/2B2BOYEH9THAH/ref=nav_wishlist_lists_1 Thank you for following along with the build! We hope you enjoy!! Much love, Jessica, Matt & Georgie If you have spring projects on your own boat and would like 5% off your purchase of Total Boat products, make sure to use our link here! https://www.totalboat.com/MJSailing Link to our boat: https://maxcruisemarine.com/ Thank you SO MUCH to our Patrons. These amazing supporters help keep us on the boat, our camera equipment up to date, and the videos coming. Without our patrons, these videos would not be possible. To join the Patreon ranks, please visit: / mjsailing or Buy us a beer through PayPal! https://www.paypal.me/MJSailing or Help contribute to the build by shopping our Amazon Wish List! https://www.amazon.com/hz/wishlist/ls... Delivery address: Kentmorr Marina 910 Kentmorr Road Stevensville, MD 21666 Thank you!, Matt & Jessica Videos made by Jessica, featuring Matt. Music: Clean Slate - Isaac Larson Desert Fire Blues - Will Harrison My Last Song - Tigerblood Jewel Rex Pandemonium (Tribute Version) - The Mondays Camera equipment used: Google Pixel 9 DJI Action 4 Previous Boats: 1983 Trisalu 37 - custom aluminum, built in Quebec (Elements of Life) Where we've been: 2.5 year refit in Indiantown, Florida; Abacos, Bahamas; St. Barth's; St. Maarten; Antigua; Saba; Azores; Ireland; Scotland; Norway; England 1989 Sabre 34 Targa (Serendipity) Where We Sailed Her: U.S. - Bahamas - Jamaica - Cuba - Cayman Islands - Honduras - Guatemala - Belize - Mexico - Bermuda - Azores - Madeira - Canary Islands - Sint Maarten - BVI's - USVI's Editing software: Adobe Premier Pro Website: http://www.mjsailing.com Facebook: / mattandjessicasailing Instagram: / mattandjessicasailing & / mj_wayfaring

This week marks a huge milestone in our catamaran build as we finally begin installing the electrical system. After months of planning and prep work, we take a trip to Annapolis to meet up with our friend Ryan, CEO of Dakota Lithium Batteries. While our batteries aren’t in hand just yet, Ryan was able to supply us with all of the Victron components that will power our boat. With those finally on board, we can officially start the electrical install. Back at the boat, Matt converts what was originally meant to be our hanging locker into the space that will house our inverters. He walks through how the mounts will be built and how the equipment will be suspended on one-inch foam to keep everything secure and isolated. Meanwhile, Jessica begins work on the overhead panels in the guest aft berth. Before the panels can go up, support blocks need to be carefully measured and placed to hold the female ends of the snaps. Because of the contours where the hull side, deck, and transom meet, this turns into a lot more measuring and laser marking than expected. It’s a meticulous process, and the next steps will continue in the following episode. We wrap up by jumping forward a week to where the hanging locker area has been sanded, painted, and is ready to receive the first Victron component — the beginning of our electrical system finally going into the boat. The next stage of the build will involve running a lot of wire throughout the boat. If you’d like to help support that part of the project, we’ve added many of the cables and supplies we need to our Amazon wishlist: Amazon Wishlist https://www.amazon.com/hz/wishlist/ls/2B2BOYEH9THAH/ref=nav_wishlist_lists_1 Thank you for following along with the build! We hope you enjoy!! Much love, Jessica, Matt & Georgie If you have spring projects on your own boat and would like 5% off your purchase of Total Boat products, make sure to use our link here! https://www.totalboat.com/MJSailing Link to our boat: https://maxcruisemarine.com/ Thank you SO MUCH to our Patrons. These amazing supporters help keep us on the boat, our camera equipment up to date, and the videos coming. Without our patrons, these videos would not be possible. To join the Patreon ranks, please visit: / mjsailing or Buy us a beer through PayPal! https://www.paypal.me/MJSailing or Help contribute to the build by shopping our Amazon Wish List! https://www.amazon.com/hz/wishlist/ls... Delivery address: Kentmorr Marina 910 Kentmorr Road Stevensville, MD 21666 Thank you!, Matt & Jessica Videos made by Jessica, featuring Matt. Music: Clean Slate - Isaac Larson Desert Fire Blues - Will Harrison My Last Song - Tigerblood Jewel Rex Pandemonium (Tribute Version) - The Mondays Camera equipment used: Google Pixel 9 DJI Action 4 Previous Boats: 1983 Trisalu 37 - custom aluminum, built in Quebec (Elements of Life) Where we've been: 2.5 year refit in Indiantown, Florida; Abacos, Bahamas; St. Barth's; St. Maarten; Antigua; Saba; Azores; Ireland; Scotland; Norway; England 1989 Sabre 34 Targa (Serendipity) Where We Sailed Her: U.S. - Bahamas - Jamaica - Cuba - Cayman Islands - Honduras - Guatemala - Belize - Mexico - Bermuda - Azores - Madeira - Canary Islands - Sint Maarten - BVI's - USVI's Editing software: Adobe Premier Pro Website: http://www.mjsailing.com Facebook: / mattandjessicasailing Instagram: / mattandjessicasailing & / mj_wayfaring

Overbuilding the engine bed might seem excessive… until you factor in weight, torque, vibration, and a moving ocean. In this episode, we lift and align our diesel engine, temporarily set it in place, then pull it back out so Matt can glass the engine mounts permanently into the engine bed. With six layers of double-bias fiberglass, this is one of those areas where strength, alignment, and patience matter more than speed. Engine weight, torque, vibration, and constant motion all get factored in here, and taking the time to do it right now will pay off later when we’re actually underway. While Matt focuses on the engine bed, I’m back in the owner’s hull working on the media cabinet area — sanding, fairing (because of course), priming, and painting. It’s not a showpiece cabinet, but it’s one of those practical spaces that still needs to be clean, durable, and easy to live with. I may have also accidentally used a much higher-end primer than most people would ever put inside a cabinet… no regrets. This episode is a good snapshot of winter boatbuilding for us: heaters running, cold temps outside, slow progress inside, and a mix of heavy mechanical work and interior finishing that slowly turns this project into a livable boat. Thanks for watching and for following along as we keep pushing this build forward, one step at a time. ⛵️

Six hundred pounds. Inches of clearance. And absolutely no room for mistakes. Now that the engine is finally inside the cockpit, the next challenge is getting it the rest of the way into the boat — and this part might be even harder than the lift itself. In this episode, we’re faced with one of the tightest moves of the entire build: getting our diesel hybrid engine up and over the cockpit sill, across the bridge deck, and into the aft berth without damaging the boat — or ourselves. With limited clearance, no working trolley on the I-beam, and six hundred pounds hanging overhead, every decision matters. We spend the day protecting surfaces, building temporary platforms, removing components for extra clearance, and constantly reworking the plan as new problems appear. What started as a carefully thought-out approach quickly turns into real-time problem solving, improvisation, and a few moments where everything feels a little too close for comfort. Thanks to a mix of preparation, patience, and some great advice from viewers, we eventually find a way to make it work — but not without a few tense moments along the way. If you enjoy honest boat builds, real problem solving, and seeing how things actually get done when plans fall apart, you’re in the right place. Thanks for watching — and as always, thanks for being part of the journey. 00:00 - Getting the diesel from the ground to the cockpit 01:18 - Protecting the Boat Before the Engine Moves 02:55 - Building a Rolling Platform in a Tight Space 04:19 - Gaining Clearance (Removing the Alternator) 07:07 - The I-Beam Problem 09:30 - Improvising Without a Trolley 13:06 - Inching the Engine Over the Cockpit Sill 15:49 - Rolling Across the Bridge Deck 17:57 - Viewer Advice Changes the Plan 19:30 - What Comes Next 20:22 - Closing

When heavy equipment meets tight clearances, things get interesting fast. This episode is one of those moments where everything slows down, everyone’s watching closely, and every single inch matters. We’re getting our diesel hybrid engine off the ground and into the cockpit — which sounds straightforward, until you remember we’re working with tight clearances, heavy equipment, and zero room for mistakes. What you’ll see here is a lot of planning, a lot of problem-solving, and a reminder that with a catamaran… even installing a single engine often means doing things twice. It’s one of those behind-the-scenes projects that really shows how much coordination goes into moving something this big without damaging the boat we’ve spent years building. After this huge moment of stress, we move back indoors to the ease of conduit. Ease of emotions that is, because fitting myself back into some of these cupboards to glass still requires a little training in gymnastics. But after getting these holes in our bulkheads sanded down and glasses, soon I'll be able to go back to my favorite task of fairing and priming. In the *next* episode, things get even more exciting as we bring the engine inside the boat and start maneuvering it into its final home in the aft guest berth — a huge step toward this system actually becoming part of the boat. As always, thank you so much for being here and supporting us. Your encouragement, comments, and backing truly make moments like this possible, and we’re incredibly grateful to have you along for the ride. 💙⚓️

This week’s episode jumps right into the fun stuff—Jessica’s back in the engine bay, drilling out two new holes in the starboard engine bed for a pair of thru-hulls we’ll be installing. It’s one of those jobs that sounds simple until you’re dangling over the engine bay with a big hole saw and a whole lot of trust in your measurements. While Jess tackles the inside, Matt’s on the outside of the hull laying in extra reinforcement so those thru-hulls have the strength and backing they need. Anytime we’re putting new holes below the waterline, we take zero chances—and Matt’s layers of glass make sure this section is rock solid. Then we move up to the forward lockers, where Matt starts drilling the openings for our new fiberglass tubes that will act as conduit. These tubes span across the very front of the boat, running through the lockers and eventually feeding into the spaces where all of our wiring will pass through. It’s one of those behind-the-scenes projects that doesn’t look glamorous, but it’s going to make a massive difference once we start pulling cables and powering systems. Thank you all so much for being here and supporting us. Seriously—your encouragement, messages, and backing keep this whole crazy boat-building adventure moving forward. We hope you enjoy the new episode! ❤️⚓️

This week’s episode is a mix of random projects we’ve been tackling around the boat all summer — the kind that never quite fit into any other video but still show the day-to-day progress of the build. We’re checking in on the helm station, which has now been primed and attached to the cabin top, and Matt’s been working on new inserts for our throttle and controllers. I’ll also take you through some work around our flush deck hatches, which have been sealed up for the past year but are finally getting sanded, faired, and primed. And to wrap it up, we’ve got a throwback clip from when Matt first primed the bows earlier this year — the first step in getting a clean, uniform surface after months of fairing. This one’s a little all over the place, but that’s just how the summer has gone — catching up on bits and pieces before we finally move indoors next month to start installation work. The sanding season is officially coming to an end, and we couldn’t be happier about it!

After weeks of sanding and fairing (the least glamorous part of boatbuilding), we finally get to do something exciting — bringing the bows of our catamaran together! The longeron and forebeam are two critical pieces that tie the front of the boat into shape. Over the past few weeks, Matt has been making careful adjustments so we can get them fitted just right. It’s a big project — and one we need to finish before the weather turns cold, since bonding them into place will require methacrylate. Before we can even think about that final step, there’s a lot of trial fitting, trimming, and tweaking to get everything to sit where it belongs. We’re also working in custom details, like the section for our anchor roller. We’re getting so close to locking in their final placement — and once that happens, all the aluminum pieces can head out for anodizing. It’s a huge milestone in this build, and one step closer to making our home-built catamaran a reality! #electricboat #CatamaranBuild #BoatLife #SustainableSailing #MJSailing We hope you enjoy!! Much love, Jessica, Matt & Georgie If you have spring projects on your own boat and would like 5% off your purchase of Total Boat products, make sure to use our link here! https://www.totalboat.com/MJSailing Link to our boat: https://maxcruisemarine.com/ Link to SouthCo: https://southco.com/en_us_int/ Thank you SO MUCH to our Patrons. These amazing supporters help keep us on the boat, our camera equipment up to date, and the videos coming. Without our patrons, these videos would not be possible. To join the Patreon ranks, please visit: / mjsailing or Buy us a beer through PayPal! https://www.paypal.me/MJSailing or Help contribute to the build by shopping our Amazon Wish List! https://www.amazon.com/hz/wishlist/ls... Delivery address: Kentmorr Marina 910 Kentmorr Road Stevensville, MD 21666 Thank you!, Matt & Jessica Videos made by Jessica, featuring Matt. 00:00 - Music: A Little Deja Vu - Steffan Carlen Losing Friends - Rain Jewels Summer Days - Etienne Roussel The End, Again - Par Hagstrom Pandemonium (Tribute Version) - The Mondays Camera equipment used: Google Pixel 9 DJI Action 4 Previous Boats: 1983 Trisalu 37 - custom aluminum, built in Quebec (Elements of Life) Where we've been: 2.5 year refit in Indiantown, Florida; Abacos, Bahamas; St. Barth's; St. Maarten; Antigua; Saba; Azores; Ireland; Scotland; Norway; England 1989 Sabre 34 Targa (Serendipity) Where We Sailed Her: U.S. - Bahamas - Jamaica - Cuba - Cayman Islands - Honduras - Guatemala - Belize - Mexico - Bermuda - Azores - Madeira - Canary Islands - Sint Maarten - BVI's - USVI's Editing software: Adobe Premier Pro Website: http://www.mjsailing.com Facebook: / mattandjessicasailing Instagram: / mattandjessicasailing & / mj_wayfaring

We’re officially kicking off the installation of our electric drive system! ⚡️ Back in the spring, we received our electric motor, but we couldn’t move forward with fittings until our couplers were milled to the proper size. With that step now complete, we’re finally able to start positioning and aligning the motor inside the boat. In this episode, you’ll see: Milling the coupler to achieve a precise fit between the motor and prop shaft Bringing the electric motor onboard for its first placement Measuring, bonding, and glassing in the motor mounts (temporarily) Priming the mounts in preparation for final alignment work This stage isn’t permanent yet — everything is still in “trial fit” mode — but it’s a huge step forward in our progress. Next up, we’ll be glassing in the mounting structures for auxiliary equipment and continuing to refine the motor installation alongside the stern tube. We’re excited to share this milestone with you as our catamaran moves closer to becoming fully electric-powered. Thanks for following along on the journey! #ElectricBoat #CatamaranBuild #BoatLife #SustainableSailing #MJSailing We hope you enjoy!! Much love, Jessica, Matt & Georgie If you have spring projects on your own boat and would like 5% off your purchase of Total Boat products, make sure to use our link here! https://www.totalboat.com/MJSailing Link to our boat: https://maxcruisemarine.com/ Link to SouthCo: https://southco.com/en_us_int/ Thank you SO MUCH to our Patrons. These amazing supporters help keep us on the boat, our camera equipment up to date, and the videos coming. Without our patrons, these videos would not be possible. To join the Patreon ranks, please visit: https://www.patreon.com/mjsailing or Buy us a beer through PayPal! https://www.paypal.me/MJSailing or Help contribute to the build by shopping our Amazon Wish List! https://www.amazon.com/hz/wishlist/ls/2B2BOYEH9THAH/ref=nav_wishlist_lists_1 Delivery address: Kentmorr Marina 910 Kentmorr Road Stevensville, MD 21666 Thank you!, Matt & Jessica Videos made by Jessica, featuring Matt. 00:00 - Milling our couplers 02:28 - Our electric motor is brought inside for the first time 07:32 - Quick update on our AC install 11:56 - Prop shaft is in, we can begin alignment 14:14 - Bonding in the foam core engine mount 17:22 - Everything is aligned - let's glass it in! 21:29 - Closing thoughts and next steps 25:04 - Closing Music: Oh! Sun - Nevin Pandemonium (Tribute Version) - The Mondays Camera equipment used: - Google Pixel 9 - DJI Action 4 Previous Boats: 1983 Trisalu 37 - custom aluminum, built in Quebec (Elements of Life) Where we've been: 2.5 year refit in Indiantown, Florida; Abacos, Bahamas; St. Barth's; St. Maarten; Antigua; Saba; Azores; Ireland; Scotland; Norway; England 1989 Sabre 34 Targa (Serendipity) Where We Sailed Her: U.S. - Bahamas - Jamaica - Cuba - Cayman Islands - Honduras - Guatemala - Belize - Mexico - Bermuda - Azores - Madeira - Canary Islands - Sint Maarten - BVI's - USVI's Editing software: Adobe Premier Pro Website: http://www.mjsailing.com Facebook: / mattandjessicasailing Instagram: / mattandjessicasailing & / mj_wayfaring
Can you believe we're finally getting to the install part of our build?? Although, since most things won't get permanently mounted until the end, I guess we could call this a fitting, haha. This week we prepare for the install of our 9k BTU AC unit from Marine Breeze, into our master berth. We went with a slightly smaller unit here, because it is meant for when we close off this hull and just want to cool our berth at night when we sleep. There will be a 16k BTU getting installed in the other hull, which will have vents to the bridge deck. Since we hadn't originally planned for AC on this boat, we didn't have a dedicated space to put it. Which means - glassing in new adjustments!! Luckily there is a space that is just about perfect for it, under our berth. We just need to make it a little deeper. Matt sets to work measuring out the space, cutting the shelf, and glassing it back in 1/2" lower. Once it's in place and can handle the weight, we do a dry fit of the unit to make sure it fits. Then, it's on to custom duct work. We'll each have our own vent that will allow us to control how warm or cool we want to be in bed (hopefully). This is going to be such a great addition to our cruising life, we can't wait to get on the water and start using it! We hope you enjoy!! Much love, Jessica, Matt & Georgie Look at all the products from Marine Breeze: https://marinebreeze.net/products/ If you have spring projects on your own boat and would like 5% off your purchase of Total Boat products, make sure to use our link here! https://www.totalboat.com/MJSailing Link to our boat: https://maxcruisemarine.com/ Link to SouthCo: https://southco.com/en_us_int/ Thank you SO MUCH to our Patrons. These amazing supporters help keep us on the boat, our camera equipment up to date, and the videos coming. Without our patrons, these videos would not be possible. To join the Patreon ranks, please visit: https://www.patreon.com/mjsailing or Buy us a beer through PayPal! https://www.paypal.me/MJSailing or Help contribute to the build by shopping our Amazon Wish List! https://www.amazon.com/hz/wishlist/ls/2B2BOYEH9THAH/ref=nav_wishlist_lists_1 Delivery address: Kentmorr Marina 910 Kentmorr Road Stevensville, MD 21666 Thank you!, Matt & Jessica Videos made by Jessica, featuring Matt and Georgie. Music: BRN RDY - Matt Large Pandemonium (Tribute Version) - The Mondays Camera equipment used: - Google Pixel 9 - DJI Action 4 Previous Boats: 1983 Trisalu 37 - custom aluminum, built in Quebec (Elements of Life) Where we've been: 2.5 year refit in Indiantown, Florida; Abacos, Bahamas; St. Barth's; St. Maarten; Antigua; Saba; Azores; Ireland; Scotland; Norway; England 1989 Sabre 34 Targa (Serendipity) Where We Sailed Her: U.S. - Bahamas - Jamaica - Cuba - Cayman Islands - Honduras - Guatemala - Belize - Mexico - Bermuda - Azores - Madeira - Canary Islands - Sint Maarten - BVI's - USVI's Editing software: Adobe Premier Pro Website: http://www.mjsailing.com Facebook: / mattandjessicasailing Instagram: / mattandjessicasailing & / mj_wayfaring

This week, we’re diving into a project that’s been quietly taking shape in the background: building our helm seat from scratch. While it might seem like a small piece of the boat, it plays a major role in both comfort and functionality—so we wanted to get it just right. Inspired by the layout of the Max Cruise hull 16, but aiming for something much lighter, we decided to build ours entirely out of foam and fiberglass—no metal frame and no extra weight. In this episode, we take you through the full process: from cutting and laminating Nida-core panels, to bonding and shaping the seat, and laying down multiple layers of glass using both vinyl-ester and polyester resin. You'll even get a peek into one of our vacuum bagging sessions, complete with that oddly satisfying whoosh as the bag seals down tight. While we were hoping to get the seat attached to the cabin top before releasing this video, we had a somewhat unexpected trip home. There was a memorial service to attend for a family member - so back to Michigan we went. And after a few days with family, bonding over old memories, the two of us took a side trip to Northern Michigan to relive some old memories of our own. We hope you enjoy!! Thanks as always for being here and supporting us through each stage of this build. We love having a place like this where we can share not just the progress, but also the quiet moments and the why behind every decision. 💙

We’re back in the engine bays this week, continuing to prep both sides of the catamaran for our twin propulsion systems—an electric motor in the starboard hull and a diesel-electric hybrid in the port hull. After receiving our full system from Hybrid Marine in the UK just a few weeks ago, we’ve been modifying and refining each engine bed to match its unique needs. On the hybrid side, Matt widened the stringers to accommodate the slightly larger diesel engine and glassed in the new structure. To get this area ready for gelcoat, I wiped down the polyester fairing compound with styrene to reduce tackiness, but even then, I spent days sanding it smooth. Meanwhile, work in the owner’s hull has been a bit more straightforward. After smoothing the surface with TotalFair epoxy fairing compound, I rolled on the first three coats of Alexseal primer. As I worked through this space, I also touched up a few low spots with more epoxy fairing, and later primed the remainder of the sole to complete the base layer for our Alexseal topcoat paint. From modifying structure to dialing in surface prep, it’s been a week of sanding, fairing, and priming—getting us one step closer to installing our propulsion systems.

We're prepping our catamaran engine beds for a brand-new hybrid propulsion system—an electric motor in one hull, and a 300+ pound diesel-electric hybrid in the other. In this episode, we tackle fiberglass reinforcements, fairing work, and reveal how we plan to move the hybrid engine into place without a crane. Back when our engines from Hybrid Marine first arrived, Matt shared his plan to rig up a pulley system in the overhead to lower the diesel-electric hybrid into the guest hull. But as always, our viewers came through with even better suggestions—so today, Matt walks through the new method we plan to use to move this 300+ pound beast into place. Before we can install anything, though, we need to fully prep the engine beds. Over in the port hull, we’ve upsized to a larger diesel engine than originally planned, which means cutting back some foam and reinforcing the area with more fiberglass for strength. Once that’s done—but before our motor mounts arrive—I jump into the fairing process in both hulls. The guest hull, where the diesel hybrid will go, will eventually be lined with sound-deadening foam, so I focus on smoothing out the base and lower hull sides. But the real fairing workout happens in the owner’s berth, where our electric motor will be installed. I’m not kidding when I say I’ve gone through nearly four gallons of epoxy fairing compound in that space alone. It’s finally close to ready for primer—and I can’t wait to see how much that transforms the space! We hope you enjoy the progress!

Get a FREE pair of crew socks with your 100% waterproof Vessi shoes! https://crrnt.app/VESSI/y6920bP9 We’ve got both bows bonded onto our catamaran now, but before we can start glassing them in place, we run into a tough—and time-consuming—setback. While the methacrylate cured between the flange and the bow, it expanded more than expected, leaving hardened ridges that now need to be ground down before we can move forward. So Jessica spends the day in tight quarters with the belt sander, clearing the way for fiberglass work on the interior seams. Once that’s sorted, Matt begins glassing the exterior—two layers of 12 oz cloth laid top to bottom, sealed in with resin and peel ply for a strong, smooth finish. Bit by bit, we’re locking these bows in place for good. Thanks for watching and supporting our build—one layer at a time! – Matt & Jessica If you have spring projects on your own boat and would like 5% off your purchase of Total Boat products, make sure to use our link here! https://www.totalboat.com/MJSailing Link to our boat: https://maxcruisemarine.com/ Link to SouthCo: https://southco.com/en_us_int/ Thank you SO MUCH to our Patrons. These amazing supporters help keep us on the boat, our camera equipment up to date, and the videos coming. Without our patrons, these videos would not be possible. To join the Patreon ranks, please visit: https://www.patreon.com/mjsailing or Buy us a beer through PayPal! https://www.paypal.me/MJSailing or Help contribute to the build by shopping our Amazon Wish List! https://www.amazon.com/hz/wishlist/ls... Delivery address: Kentmorr Marina 910 Kentmorr Road Stevensville, MD 21666 Thank you!, Matt & Jessica Videos made by Jessica, featuring Matt and Georgie.

Go to https://nordvpn.com/mjsailing to get 4 extra months on a 2-year plan!! Just use code MJSAILING A huge thanks to this video's sponsor NordVPN. ALL PROCEEDS go directly to materials for custom build catamaran. This week we once again try bonding a bow onto our boat. If you caught last week's episode, you'll know that everything started smoothly, but right at the end our methacrylate cured before we had the time to make our fine tuning adjustments, and has left some gaps between the bow and hull that will need a lot of extra fairing. We didn't want to have to go through that chaos again, especially since we're down the extra set of hands that my dad had lent, so for the port side bow we try a completely different approach. This bow is getting bonded while it's already in place. It was easy enough to get the bow seated and use screws and blocks to adjust the flange until it was flush with the hull - but the prep for injecting methacrylate was so time consuming!! On the exterior Matt had to cover the seam with clear tape to keep our bonding agent from squeezing out, as well as drill holes just outside of this to be able to inject the methacrylate. Then I had the fun job of sliding into the forward lockers, still covered in exposed fiberglass, and then tape the seams through the inside - trying to stick my head and arms into the little holes drilled into bulkhead one last week. In the end we were left with a perfectly aligned bow, but with all the prep work and multiple mixings into 300 ml caulk tubes, this job took 4 hours instead of 1. Was it worth it? We're not sure...we're just glad the job is done! Enjoy!!

