Welcome aboard to the our video site for sailors. We are being constantly blasted by scammers and pirates, so registration is invite only
contact@sailorsahoy.com with "Invite". No spam, no newsletters. Just a free account
السراويل القصيرة خلق

After an ice storm and a late-night show, we return to our sailboat to see what winter left behind. Frozen lines, rigging checks, and a full winter boat inspection to make sure everything survived. After the storm, we bring in provisions for the weekend, wake up to quiet marina mornings, make coffee and a warm omelet bowl with music playing in the background, and take care of a failing electrical outlet onboard. This is real winter sailboat life—maintenance, problem-solving, and slowing down together. If you’re into sailing vlogs, liveaboard life, or learning what winter boating is really like, this episode is for you. ⚓ Subscribe for honest sailing life, boat maintenance, and cozy moments from the galley. Cheers! - Rodney & Cyndi
0
0
0
471

0
0
0
0
561

des question que je me suis poser .... est ce assez grand ... moi je dit OUI ...pour moi 5.9 pied ... ca prend juste de meilleur coussin ...
0
0
0
2

MrBeast Try to guess which tiktoks have more views #10 #shorts #shorts #mrbeast #mrbeastreactions life hacks,crafts,slime,do it yourself,diy,lifehacks,dily projects,useful things,how to,experiment,experiments,diy activities,handcraft,prank,funny,challenge,pranks,secret,diy slime,laugh,new,skills,tricks,tips,fun

0
0
0
6

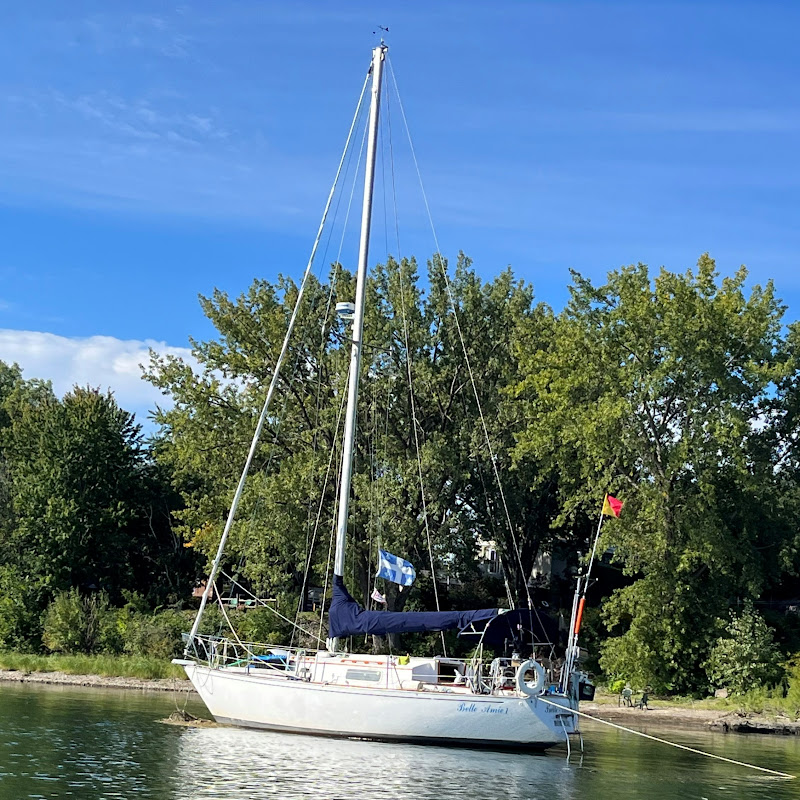
Aujourd’hui, on sort le bateau de l’eau avec un immense travel lift de 350 tonnes ! 😱 Une journée impressionnante au port où on voit vraiment la puissance de la machine et la taille incroyable du bateau. 🔧 Suivez les préparatifs, la mise en place, et ce moment spectaculaire quand tout se soulève lentement ! 🌊 Rejoins l’aventure Voilier Belle Amie1 partout : 📺 YouTube : https://www.youtube.com/c/voilierbelleamie1 📸 Instagram : https://www.instagram.com/voilierbelleamie1 🎵 TikTok : https://www.tiktok.com/@voilierbelleamie1 ⚓ Facebook : https://www.facebook.com/voilierbelleamie1 💬 Dis-moi en com’ : tu aurais confiance en un travel lift de cette taille ? Abonne-toi pour plus ! #boatlife #boatlife #travelift #pecheenmer #grutebateau #sailingadventure #marina #voyagedebateau #sortiedebateau #sailinglife #caribbeanlife #viralvideo #boatinglifestyle #bateau #oceanvibes
0
0
0
244

0
0
0
271
