Welcome aboard to the our video site for sailors. We are being constantly blasted by scammers and pirates, so registration is invite only
contact@sailorsahoy.com with "Invite". No spam, no newsletters. Just a free account
শর্টস সৃষ্টি
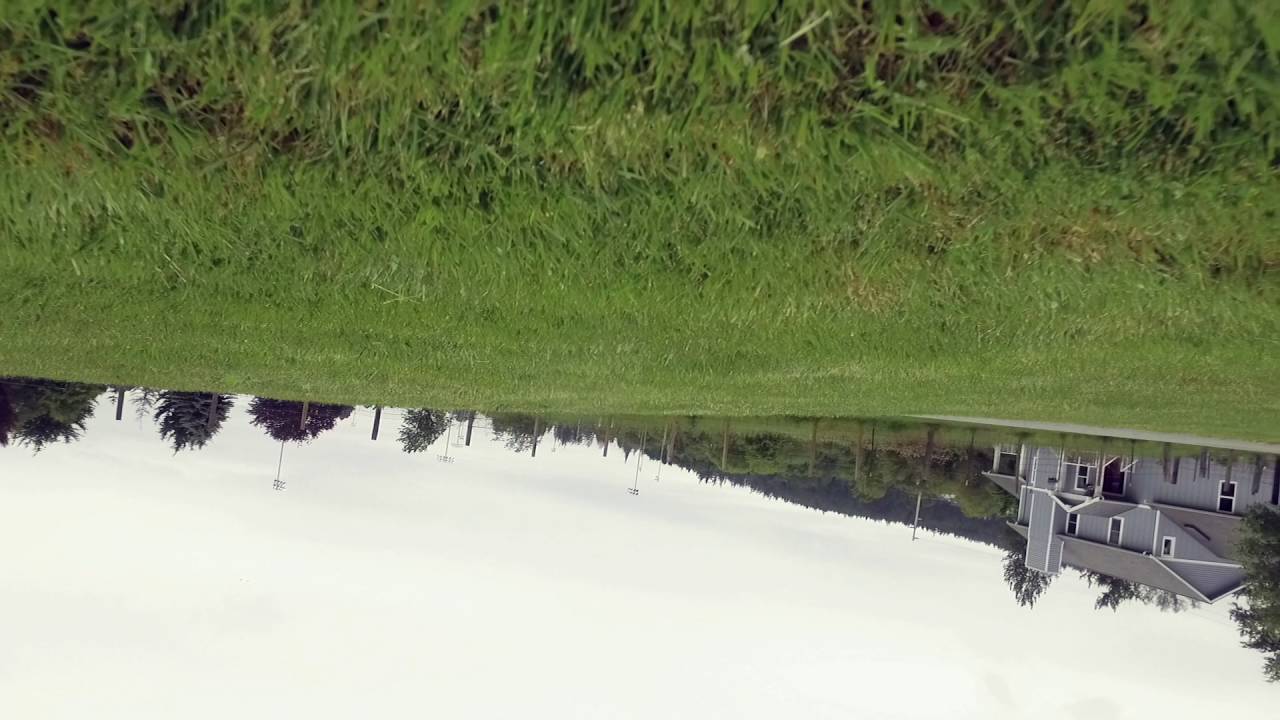
First crash of my DJI Phantom 3 Standard. I was dumb... Fortunately it was in the grass next to my house. Music: http://www.bensound.com/royalty-free-music

0
0
0
307

Our mission is simple. We want you to achieve results. Your learning is our success, and this course has been designed with this goal solely in mind. You'll begin to learn new concepts and techniques through the videos and resources presented online. Then you'll take our recommended actions combined with your new knowledge and skyrocket your dinghy performance to the next level. Virtual Coaching Sign Up Link: https://discord.gg/virtualcoaching Visit: https://internationalsailingacademy.com/ Laser Sailing Coaching: https://internationalsailingacademy.com/about/ ISA Online: http://learn.internationalsailingacademy.com Laser Sailing Clinics: https://internationalsailingacademy.com/clinic-dates/ #lasersailing #ilca #ilcasailing #sailing #ilcasailors #lasersailboat #laserclinic #ilcaclinic #clinicforlasers #ilcaclinicmexico
0
0
0
201
Caramella con Zucchero
0
0
0
526

Would you soar silently above water instead of skimming through waves? Rate this watercraft from 1-5 stars and comment below! Quadrofoil Q2 (Q2S / Q2A) © Quadrofoil Length: 3.53 m (with outboard) / 2.995 m (hull) Beam: 2.593 m (with foils) Passengers: 2 Motor: 3.7-5.5 kW electric outboard Top Speed: ~40 km/h (21 knots) Range: up to ~50 nautical miles at high speed; flight mode begins above ~12 km/h Price: from €26,000 (standard) to ~€76,000 for limited edition The Quadrofoil is a twin-seat electric hydrofoil watercraft engineered to lift above the water at low speeds for remarkably smooth, quiet rides. Thanks to its C-shape foils, lightweight composite hull, and intuitive steering where all foils pivot for stability, the Q2 delivers Go-Kart-like agility and near-silent performance. Its Limited Edition version adds luxury trim, features like pull-out ladders, special aft platform, and a striking graphic kit. Perfect for eco-minded adventurers, rentals, or commuters who want something futuristic yet practical. #Quadrofoil #ElectricFoiler #HydrofoilPWC #HarbourMasters

0
0
0
118

The River's and the Glens were in close contact during the June 5th Club Racing out of Strangford Lough Yacht Club. We the breeze up ahead of a rain squall the River were flying down wind on the second lap as they cut their way through the Glen fleet on their way to the top mark The post war Glen class is one of Alfred Mylne classic designs, it is always great sight to see them gliding by you on as you race on Strangford lough. We are extremely luck to have over a dozen of them racing regularly out of Strangford Lough Yacht club (SLYC) along with the pre war Mylne Rivers with the majestic lines. The team at bottom up boats hope you are enjoying the sort bits of our close crosses from the 2024 season. Tunes from No Copy Right Sounds Song: Culture Code - Make Me Move (feat. Karra) [NCS Release] Music provided by NoCopyrightSounds Free Download/Stream: http://ncs.io/makememove Watch: http://youtu.be/vBGiFtb8Rpw
0
0
0
636

The Adriatic’s last undiscovered secret A dramatic sail-scape with steep mountains covered in dense firs and cedars plummeting into the sea. Ancient fortress towns straight out of George RR Martin epics have their counterpoint in luxury developments like Porto Montenegro. www.theyachtweek.com
0
0
0
3,794
