


סרטונים אחרונים


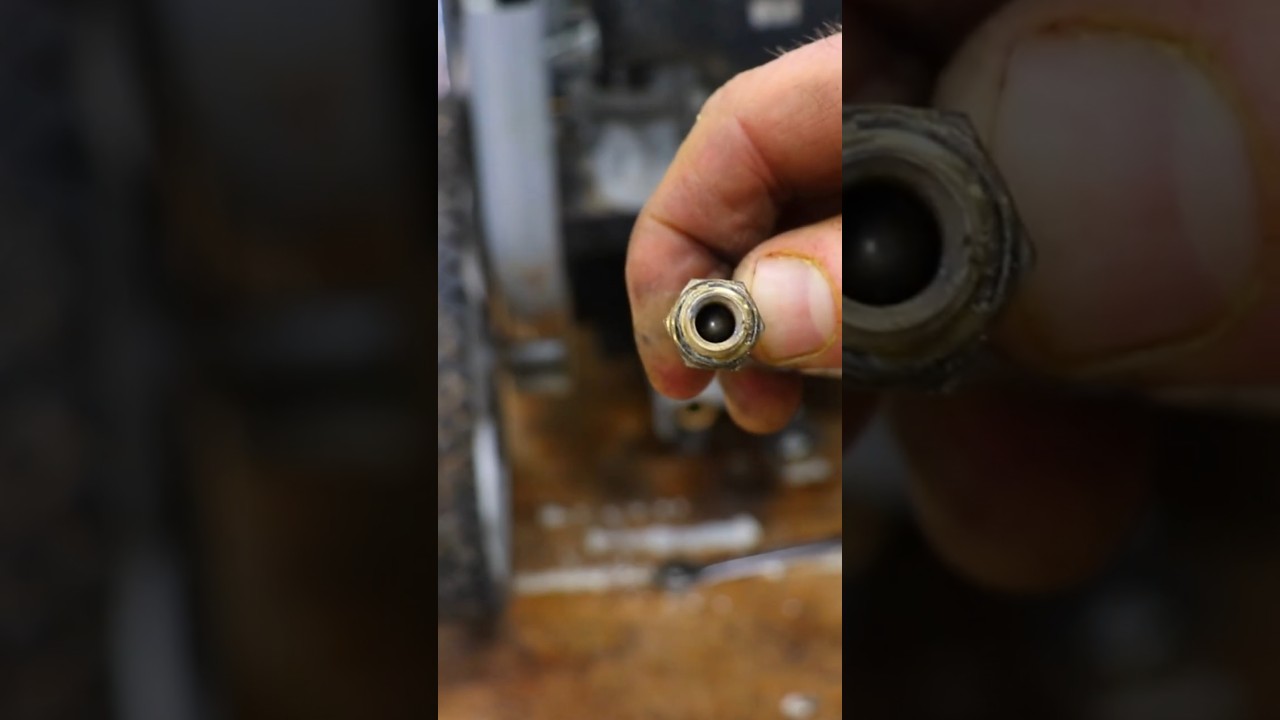
In this video I show how to repair an automatic soap dispenser, soap pickup, or detergent mixer, on a pressure washer. I explain how it works, demonstrate how to disassemble and clean the fitting and internal parts (bearing and spring), and re-assemble. Take your broken pressure washer and get it working again in a matter of minutes without spending any money.

In this video I show how to take a small engine that won't start and fix it. I found a broken pressure washer for free at the dump and demonstrate how to get it running. I discuss the Otto Cycle (Intake, Compression, Expansion, Exhaust), or Suck, Squeeze, Bang, Blow and how the fire triangle (Fuel, Oxygen, Ignition) relate to small engines. Fuel is the gasoline, Oxygen is compression, and Ignition is the spark. I show how to test each one of these requirements with multiple methods. I demonstrate checking compression by pull start and how to use a compression test gauge. I show how to test spark the old school way as well as with a commercial tester. Then, I show how to clean fuel lines, fuel pickups, and the carburetor. I also discuss small engine best care practices for storage. Like shutting off the fuel valve and letting the carb run dry. Finally, I show the pressure washer fully repaired and sell it for a $100 profit. Help support the channel by using these Amazon Associate links for items I use in the video and my shop: Compression Tester: https://amzn.to/4tiT2az Wrenches: https://amzn.to/4tiT2az Ratchet Set: https://amzn.to/482buMd Ultrasonic Cleaner: https://amzn.to/3O344BH Carb Cleaner: https://amzn.to/4bGnx48 Pressure Washer Wand & Hose: https://amzn.to/4cdruNO

JM tests the greenhouse automatic ridge vent system after replacing the motors and fixing the limit switches. They are now fully operational for the first time in over four years since buying the house. #greenhouse #gardening #diy #repairing #homestead
JM disassembles, diagnosis, and tries to repair the motors for the automatic greenhouse vents. He discovers that they overheated, burnt up, and melted the windings. Luckily replacements can be ordered. Now he needs to adjust the limit switch system to prevent this from happening again. #greenhouse #electrical #broken #diy #workshop

In an attempt to get the automatic greenhouse vents working, JM discovers that the motors are seized. #greenhouse #gardening #electrical #broken

JM collects chicken eggs and tries to gain Peewee's friendship by treating the flock with homemade Irish soda bread breadcrumbs left over from St Patrick's Day. He successfully collects eggs while Peewee lurks outside the coop waiting to attack. #chickens #homestead #backyardchickens #chickencoop #farmlife

JM collects eggs again and has to face off with Peewee the rooster. After being given treats and locked outside, Peewee charges the barrier and attacks JM. The rooster is returned outside while JM freshens up the nest boxes with new straw. Peewee is ready to attack as soon as the net is moved and he can get back into the coop. #chickens #homestead #backyardchickens #rooster

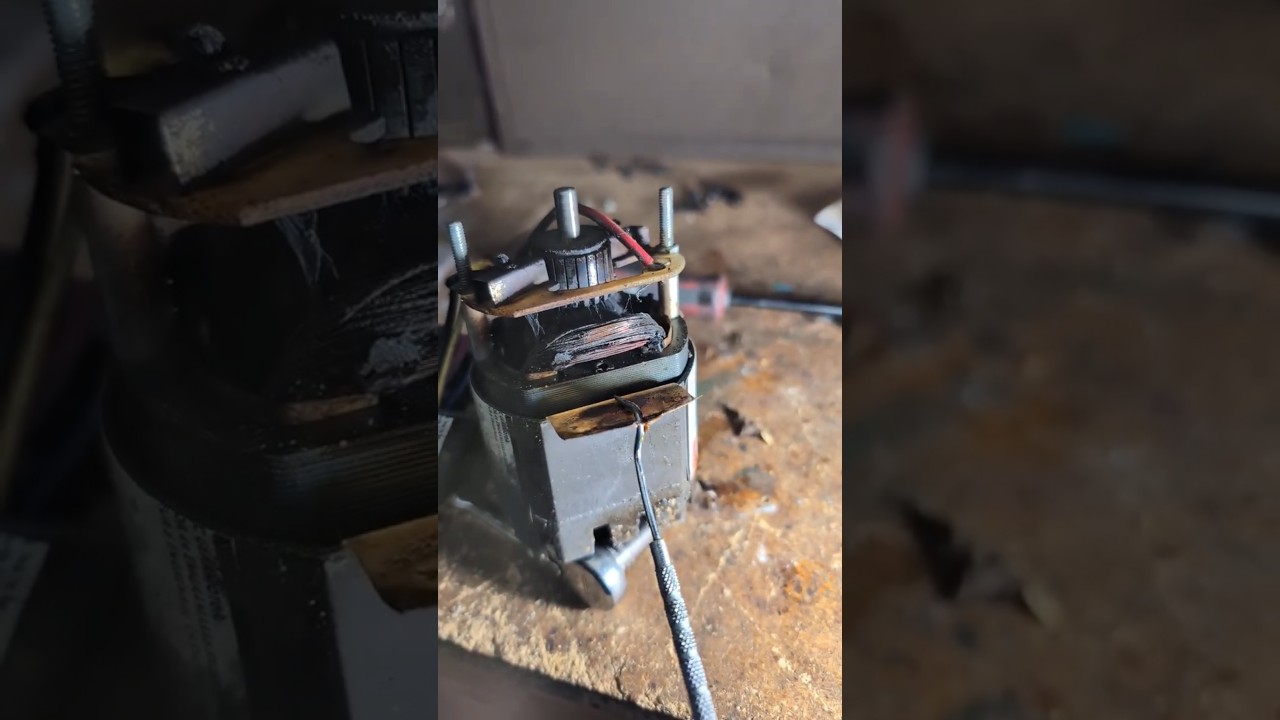
In this short I try to diagnose why the motor on my Leonard Grind-R-Lap, low speed carbide grinder, is smoking like crazy. I end up replacing the motor and getting it running nice and smooth. #machineshop #carbidetools #tools #electrical #motor #lapidary
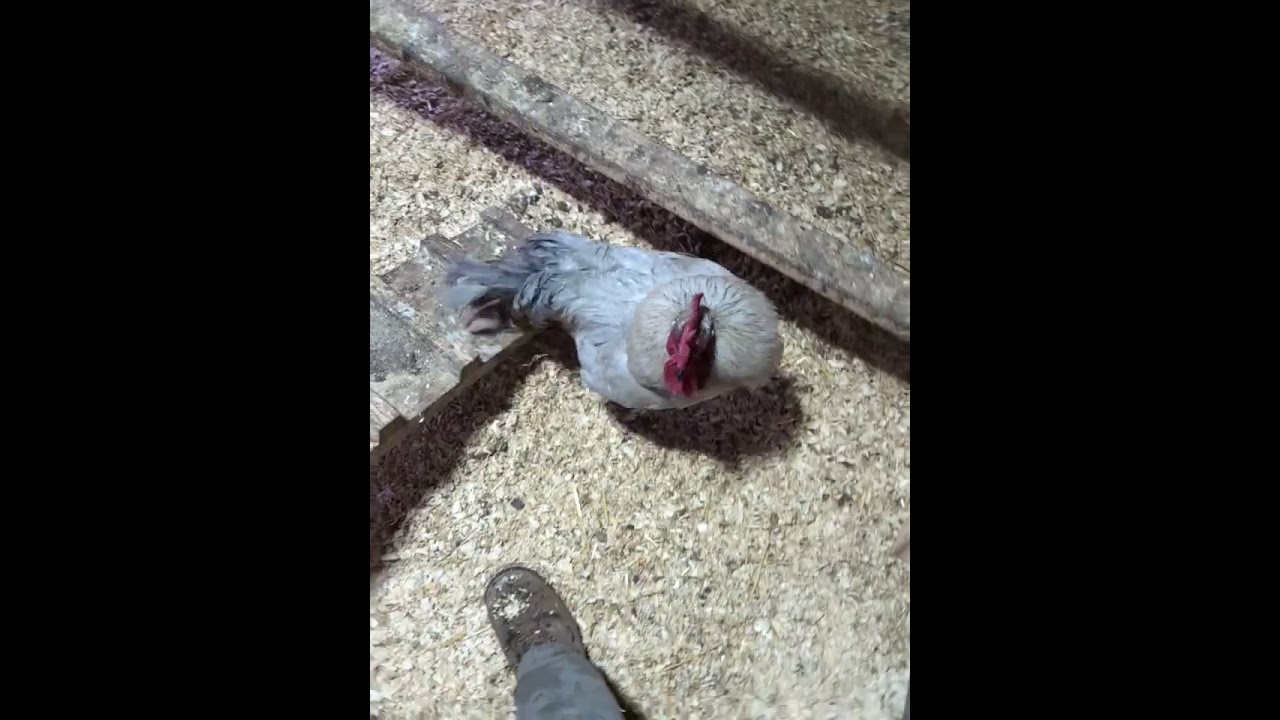
JM collects chicken eggs and gets attacked by Peewee the angry Lavender Orpington rooster. round 3 #chickens #farmlife #homestead

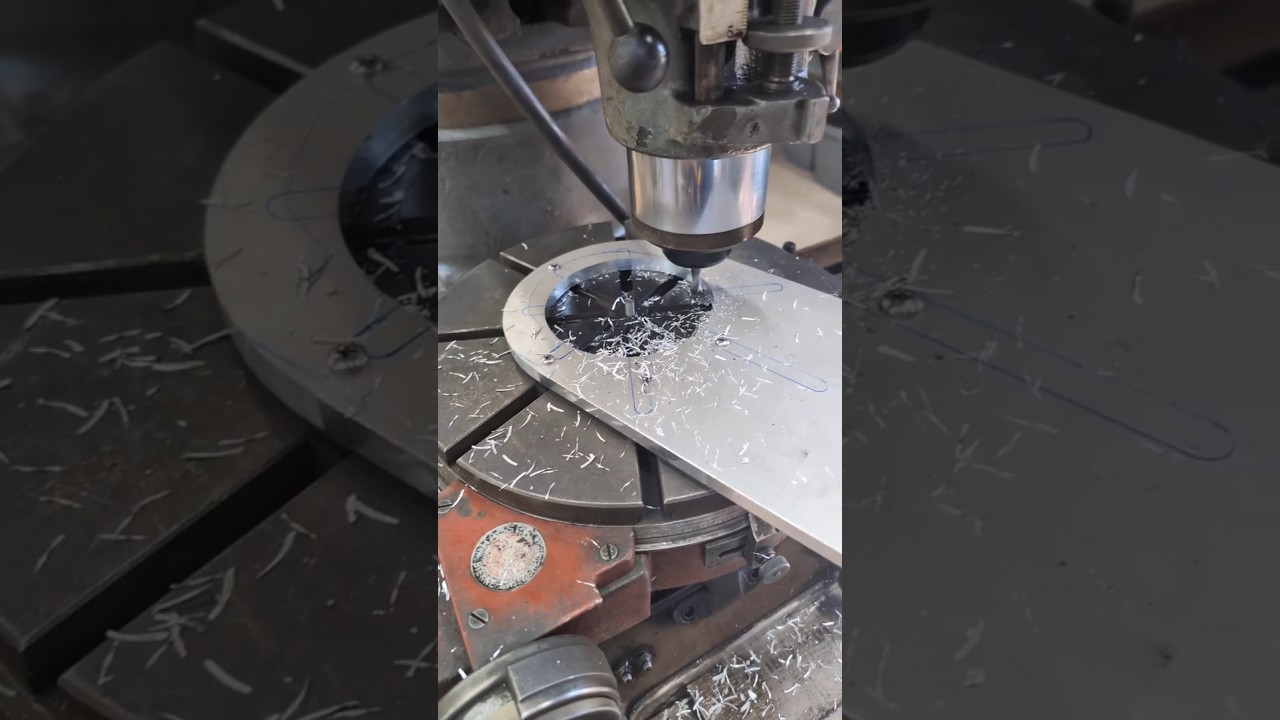
In this video rebuild the stand and support points for my granite surface plate. I replace the board it rests on and relocate the supports from the four corners to three calculated points per federal specifications. Amazon Affiliate Links help support the channel: Desk Pad/Surface Plate Cover: https://amzn.to/4rXjqq2 #machineshop #machinetools #workshop #diy #howto #granite
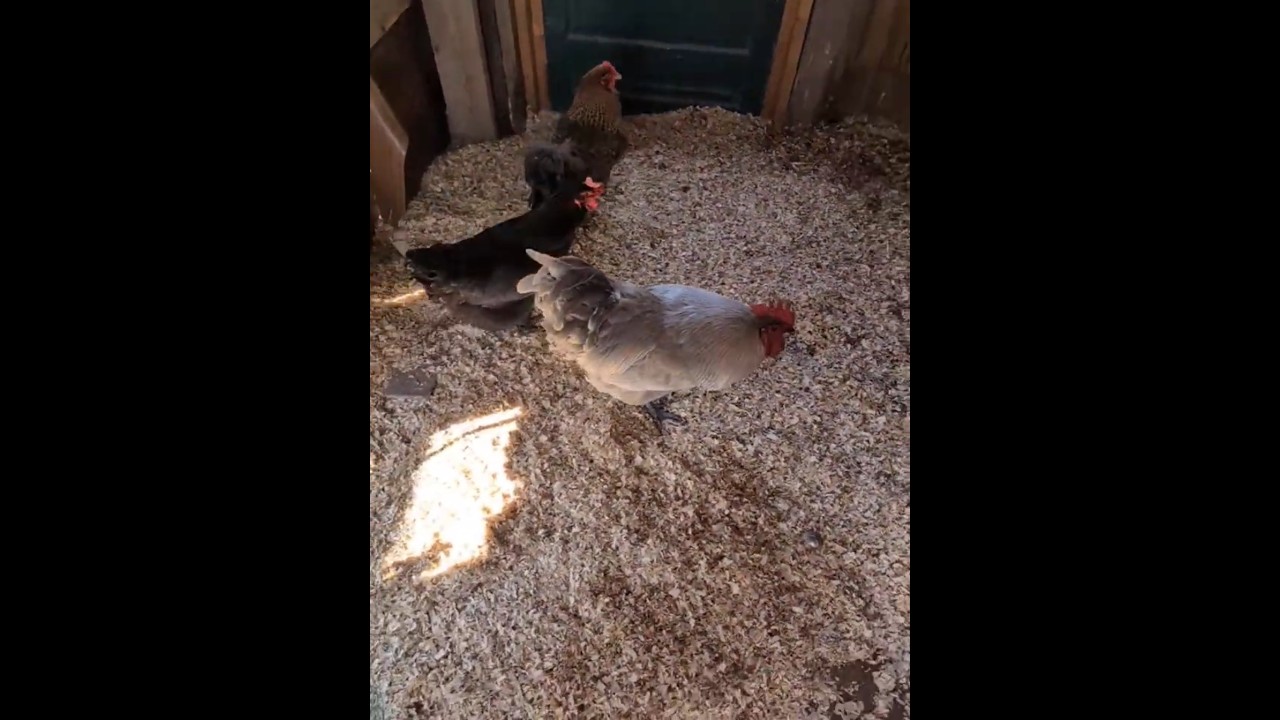
JM confronts Peewee the angry rooster to collect the chicken eggs. #farmlife #chickens #homestead


Join me as I take a deep dive into my brand-new FF Industrial FF18R mini excavator (mini digger), a Chinese import that I purchased new through a government auction. In this video, I’ll walk you through: ✅ Standard equipment & accessories ✅ Specifications & pricing details ✅ How to remove body panels ✅ Changing the oil & hydraulic fluids ✅ Adding quick drain oil hoses ✅ Digging in action! If you’re considering getting an affordable mini excavator, or just want to see this machine in action, this video is for you! 🔧 Gear & Tools I Used: Supplies: 14mm drain hose: https://amzn.to/3Xcp8aq 12mm drain hose: https://amzn.to/3Xb00Aw Battery Tender: https://amzn.to/439scYE Tools: Thread Checker Set: https://amzn.to/4iahzJm As an Amazon Associate I earn from qualifying purchases. Got questions? Drop them in the comments! Thanks for watching!

In this video I complete the restoration on my 12 inch Atlas Craftsman metal lathe. I reassemble the lathe on its new bench, test all the functions such as back gear, power feed, cross feed, and quick change gear box. Finally, I make some test cuts in a piece of scrap brass. Supplies: Rust Remover: https://amzn.to/3ZI45M9 SEA 20 Machine Oil: https://amzn.to/3ZrjXCx SEA 20 Non Detergent Oil: https://amzn.to/3ZNWOty Link Belts: https://amzn.to/3kQGGIY Shop Towels: https://amzn.to/3yjbRQg WD-40: https://amzn.to/3ITSfHj Degreaser: https://amzn.to/3IWdlVI Blue Tape 1": https://amzn.to/3L1SRxc Blue Tape 2": https://amzn.to/3yjA2OE Primer: https://amzn.to/3kTDqMZ Paint: https://amzn.to/3kVsnmo Clear Coat: https://amzn.to/3F5puX0 Tools: Chuck Wrench: https://amzn.to/3IZN0Gl Oil Can: https://amzn.to/3YqV4pg 15L Ultrasonic Cleaner: https://amzn.to/3ITVte1 Hearing protection: https://amzn.to/3IWmgGv Safety Glasses :https://amzn.to/3ZDnLQK Mask/Respirator: https://amzn.to/41MvrCd Wrenches: https://amzn.to/3F45B2I Ratchets: https://amzn.to/3mtzseu Pin Spanner Wrench: https://amzn.to/3IWiYmQ Camera Equipment: Canon SL2 - https://amzn.to/2GPW1ms Tripod - https://amzn.to/2XWVhSd GoPro: https://amzn.to/3tKVjiB

In this video I continue the restoration on my 12 inch Atlas Craftsman metal lathe. I restore the headstock and replace the broken drive pully. Supplies: Rust Remover: https://amzn.to/3ZI45M9 SEA 20 Machine Oil: https://amzn.to/3ZrjXCx SEA 20 Non Detergent Oil: https://amzn.to/3ZNWOty Link Belts: https://amzn.to/3kQGGIY Shop Towels: https://amzn.to/3yjbRQg WD-40: https://amzn.to/3ITSfHj Degreaser: https://amzn.to/3IWdlVI Blue Tape 1": https://amzn.to/3L1SRxc Blue Tape 2": https://amzn.to/3yjA2OE Primer: https://amzn.to/3kTDqMZ Paint: https://amzn.to/3kVsnmo Clear Coat: https://amzn.to/3F5puX0 Tools: Chuck Wrench: https://amzn.to/3IZN0Gl Oil Can: https://amzn.to/3YqV4pg 15L Ultrasonic Cleaner: https://amzn.to/3ITVte1 Hearing protection: https://amzn.to/3IWmgGv Safety Glasses :https://amzn.to/3ZDnLQK Mask/Respirator: https://amzn.to/41MvrCd Wrenches: https://amzn.to/3F45B2I Ratchets: https://amzn.to/3mtzseu Pin Spanner Wrench: https://amzn.to/3IWiYmQ Camera Equipment: Canon SL2 - https://amzn.to/2GPW1ms Tripod - https://amzn.to/2XWVhSd GoPro: https://amzn.to/3tKVjiB

In this video I build a steel bench for my 12 inch Atlas Craftsman metal lathe. Supplies: Self Etching Primer: https://amzn.to/45c6EYw Paint: https://amzn.to/48rDjMy Grinding Wheel: https://amzn.to/3F4K8pL Flap Disc: https://amzn.to/3EWg8fZ Cut off wheel: https://amzn.to/3EYW0K7 Tools: Welder: https://amzn.to/46uOqm3 Metal Cutting Saw: https://amzn.to/3Zz19C9 Grinder: https://amzn.to/3tjM0Za Batteries: https://amzn.to/45adTjS Hearing protection: https://amzn.to/3IWmgGv Safety Glasses :https://amzn.to/3ZDnLQK Mask/Respirator: https://amzn.to/41MvrCd Camera Equipment: Canon SL2 - https://amzn.to/2GPW1ms Tripod - https://amzn.to/2XWVhSd GoPro: https://amzn.to/3tKVjiB

In this video I continue the restoration on my 12 inch Atlas Craftsman metal lathe. I restore the quick change gear box and counter shaft assembly. Supplies: Rust Remover: https://amzn.to/3ZI45M9 SEA 20 Machine Oil: https://amzn.to/3ZrjXCx SEA 20 Non Detergent Oil: https://amzn.to/3ZNWOty Link Belts: https://amzn.to/3kQGGIY Shop Towels: https://amzn.to/3yjbRQg WD-40: https://amzn.to/3ITSfHj Degreaser: https://amzn.to/3IWdlVI Blue Tape 1": https://amzn.to/3L1SRxc Blue Tape 2": https://amzn.to/3yjA2OE Primer: https://amzn.to/3kTDqMZ Paint: https://amzn.to/3kVsnmo Clear Coat: https://amzn.to/3F5puX0 Tools: Chuck Wrench: https://amzn.to/3IZN0Gl Oil Can: https://amzn.to/3YqV4pg 15L Ultrasonic Cleaner: https://amzn.to/3ITVte1 Hearing protection: https://amzn.to/3IWmgGv Safety Glasses :https://amzn.to/3ZDnLQK Mask/Respirator: https://amzn.to/41MvrCd Wrenches: https://amzn.to/3F45B2I Ratchets: https://amzn.to/3mtzseu Pin Spanner Wrench: https://amzn.to/3IWiYmQ Camera Equipment: Canon SL2 - https://amzn.to/2GPW1ms Tripod - https://amzn.to/2XWVhSd GoPro: https://amzn.to/3tKVjiB

