Welcome aboard to the our video site for sailors. We are being constantly blasted by scammers and pirates, so registration is invite only
contact@sailorsahoy.com with "Invite". No spam, no newsletters. Just a free account
Calção Crio

A little boat day ASMR for you 🔊 🛥️ 🌞

0
0
0
511

0

0
0
0
16

#yachtlife #yachting #sailing #boatlife #boating #swisslife
0
0
0
693
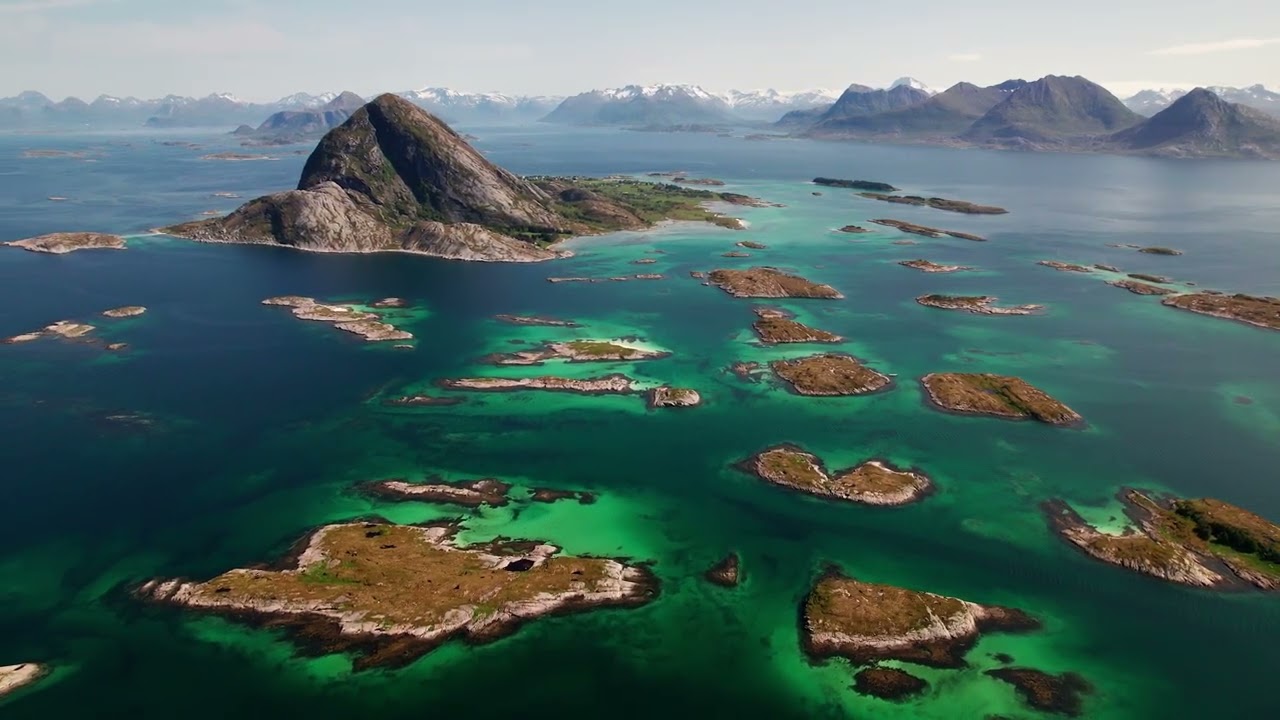
Join us by sailboat, were we sail from island to island and climb mountains. Towering mountains, thousands of islands and a unique coastal culture that is on the UNESCO’s World Heritage List. Experience Norway’s second largest glacier Svartisen and the famous mountain Torghatten. Hike mountains such as the Seven Sisters and Rødøyløva, learn about the region’s culture and history, eat delicious local food, move between islands on your way to the Træna Music Festival, and much more! Read more about our sailing trips to Helgeland here; https://seilnorge.no/destinations/helgeland/
0
0
0
1

Tune in every Friday to catch a glimpse into our owners and their boats - The Swallows
0
0
0
138

pratar han om en ö?
0
0
0
1,131
